Art
14-24mm F2.8 DG DN
(L-Mount)
Before Updating
- Please ensure that the firmware of the camera body is updated to the latest version.
- Use a fully charged battery or connect the camera to the AC adapter.
- Do not disconnect the battery or the AC adapter during the firmware update of the lens.
- Ensure the power of the camera is always kept ON during the firmware update of the lens.
- The lens needs to be attached to a camera to update the firmware.
The following procedure is to update the lens firmware via SIGMA fp. For firmware updates of Leica and Panasonic L-Mount cameras, please follow the instruction manual for each camera.
Ver.1.4 2022.04.07
・It introduces compatibility with the “focus ring control” function of the camera, allowing either “linear” or “non-linear” focus movement to be selected when using MF.
* SIGMA fp L, SIGMA fp, Panasonic Lumix S1, Lumix S1R, Lumix S1H, Lumix S5, Lumix BS1H, Leica SL2, SL2-S are supported.
* SIGMA fp L is supported by the current updated firmware Ver.2.00 that has been released on January 27, and SIGMA fp will be supported by updating to firmware which is scheduled to be released on April 21st.
* For more information on linear and non-linear focusing, please refer to our frequently asked questions.
・It optimizes the scale bar display during manual focus.
Update Procedure
Turn on the camera after attaching the lens.
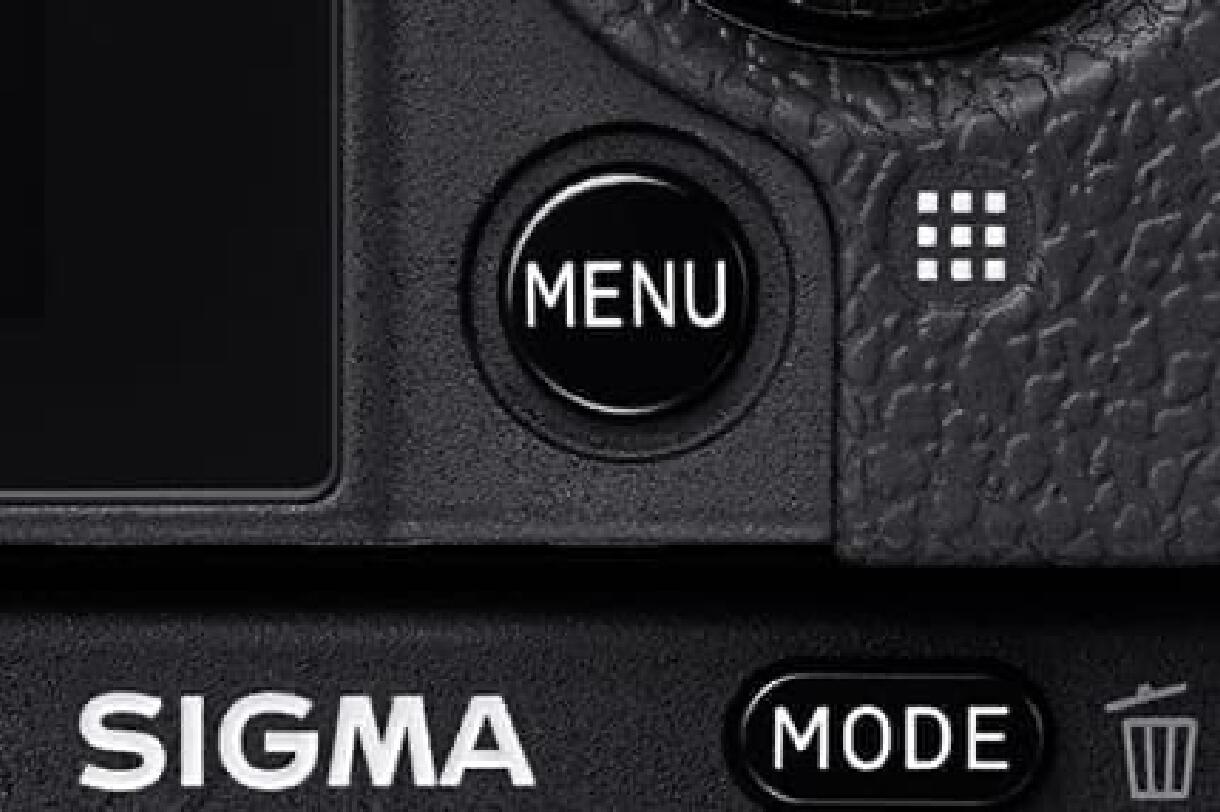
Press the MENU button on the back side of the camera body and open the setup menu.
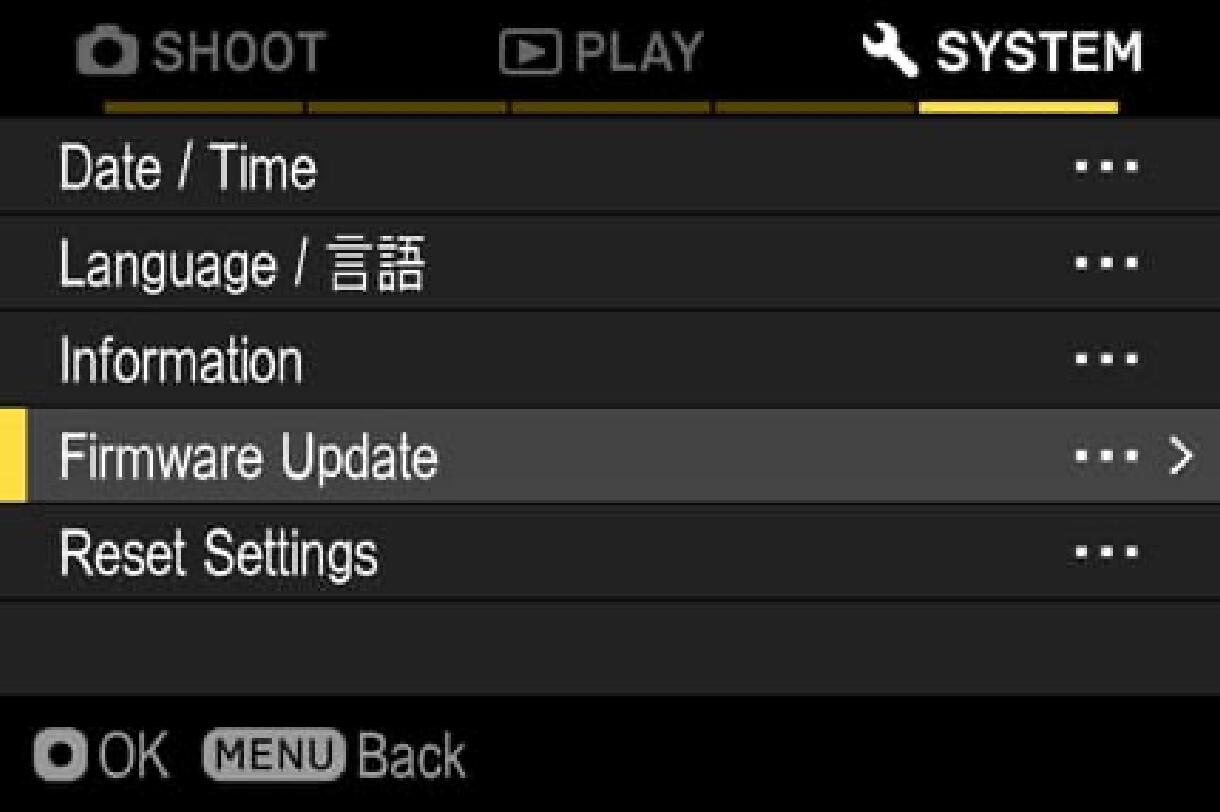
Select “Firmware Update” from the setup menu.
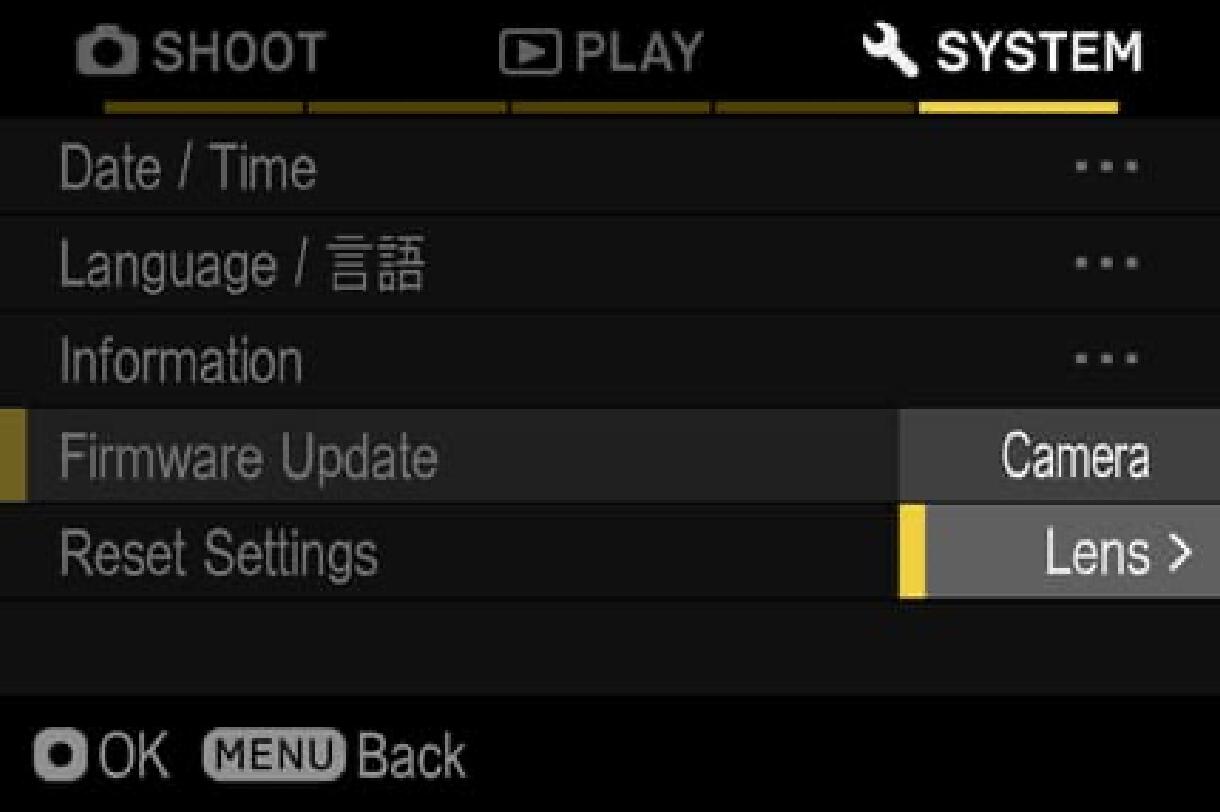
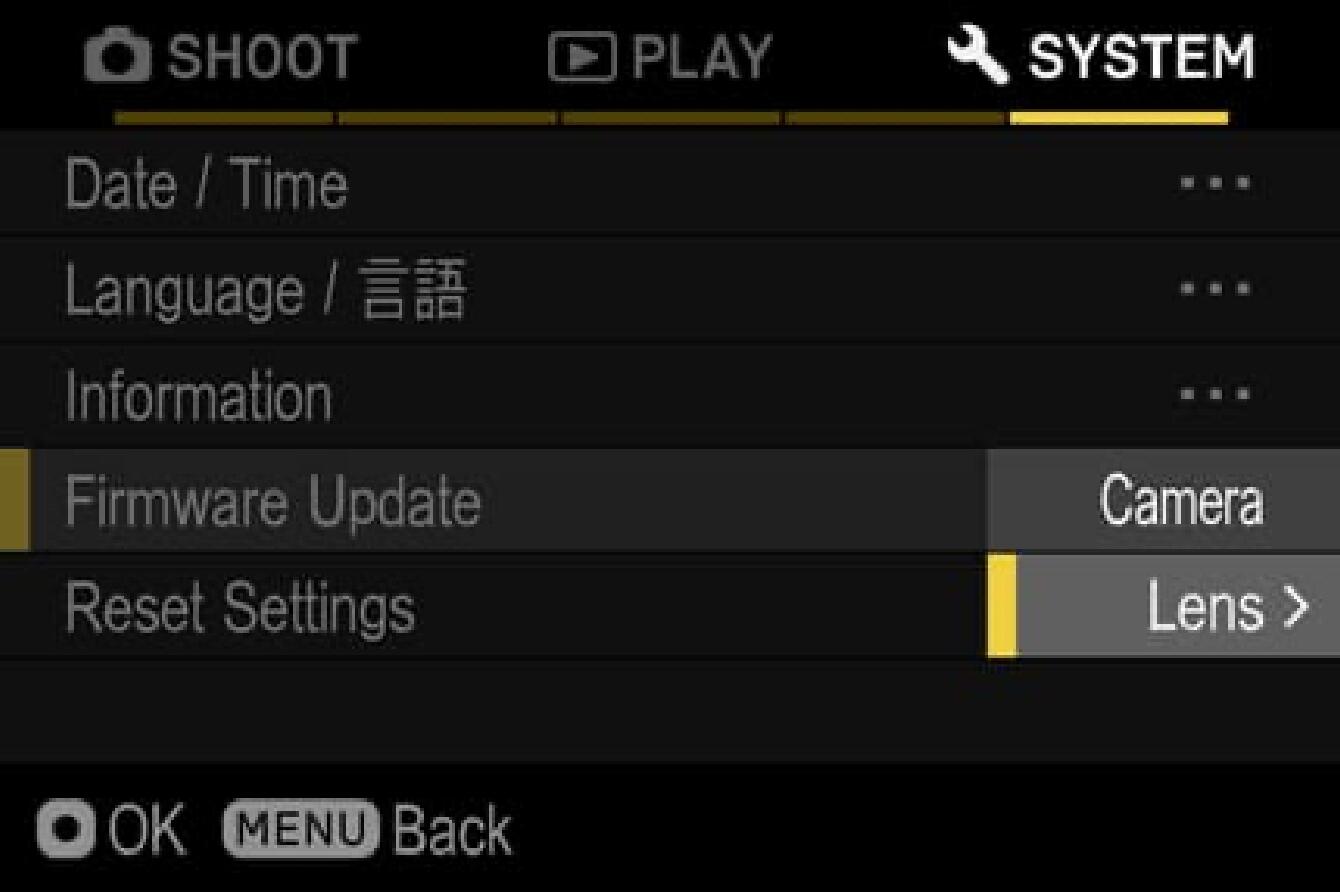
After the OK button is pressed, “Camera” and “Lens” shows up. Please select “Lens”.
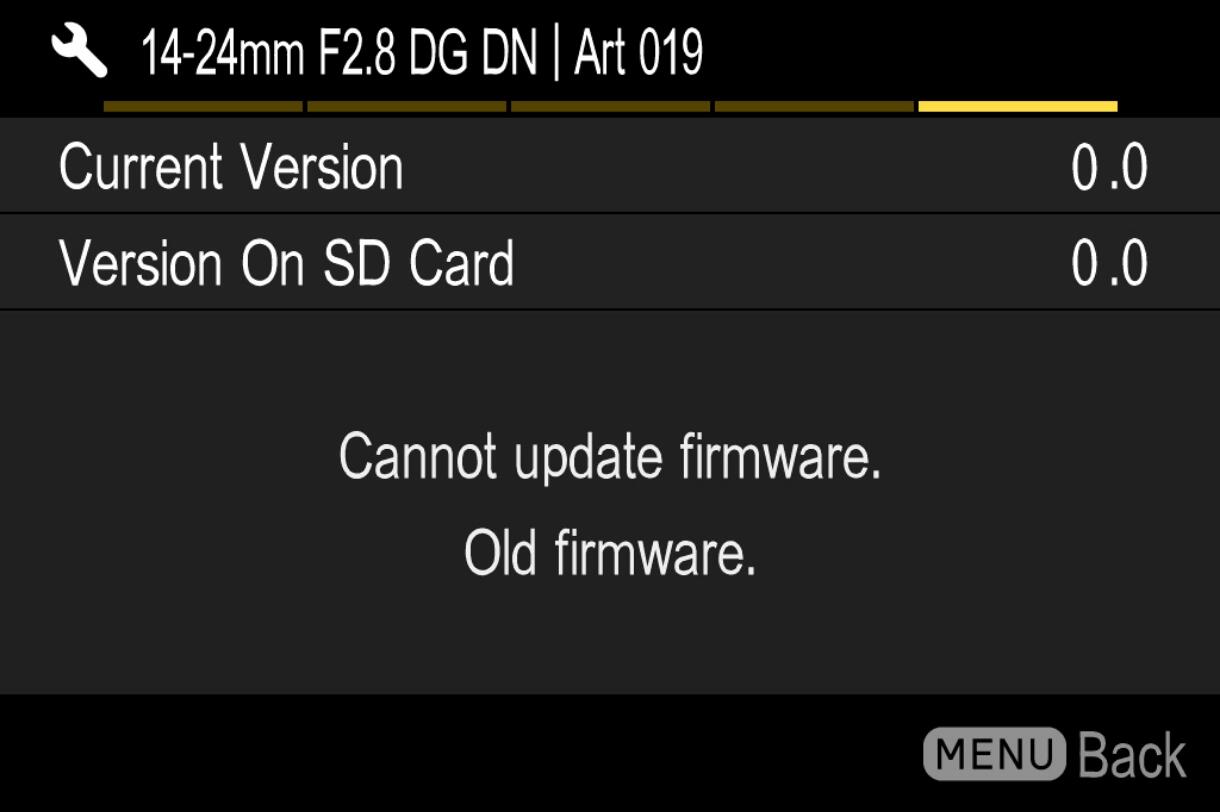
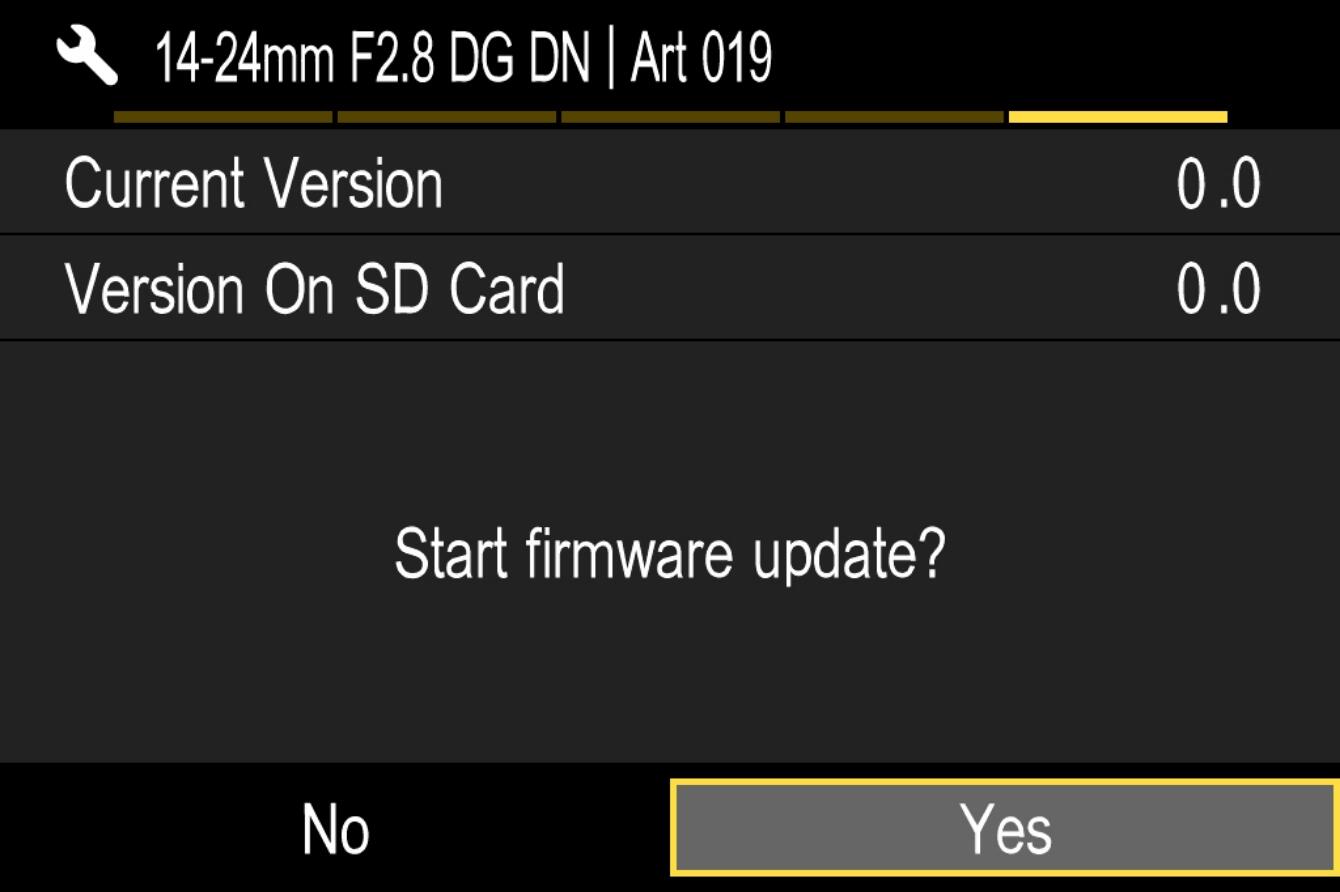
The firmware version that is installed in the lens will show up.
If the firmware version is “Ver.1.3” or older, it is necessary to download the new version and update.
Firmware Update
- STEP 01
Prepare SD/SDHC/SDXC card and format in camera.
Note: Please make sure that important data is not inside your SD/SDHC/SDXC card before format.
- STEP 02 For Windows
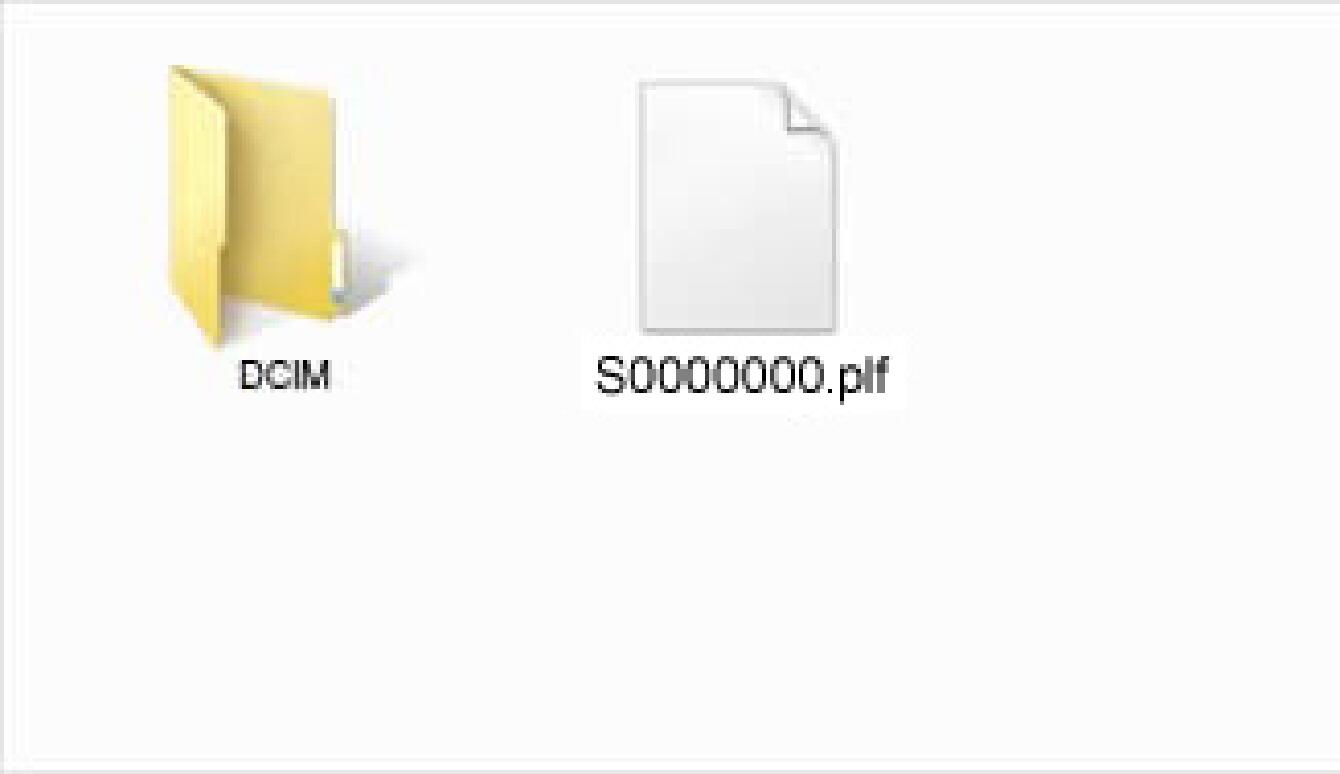
Connect the SD/SDHC/SDXC card to the computer via card reader etc. and copy the downloaded file to the root directory (the top layer of the file structure) of the SD/SDHC/SDXC card. (The copy destination is not in the “DCIM” subfolder)
(It appears differently depending on OS version.)
- STEP 02 For Macintosh
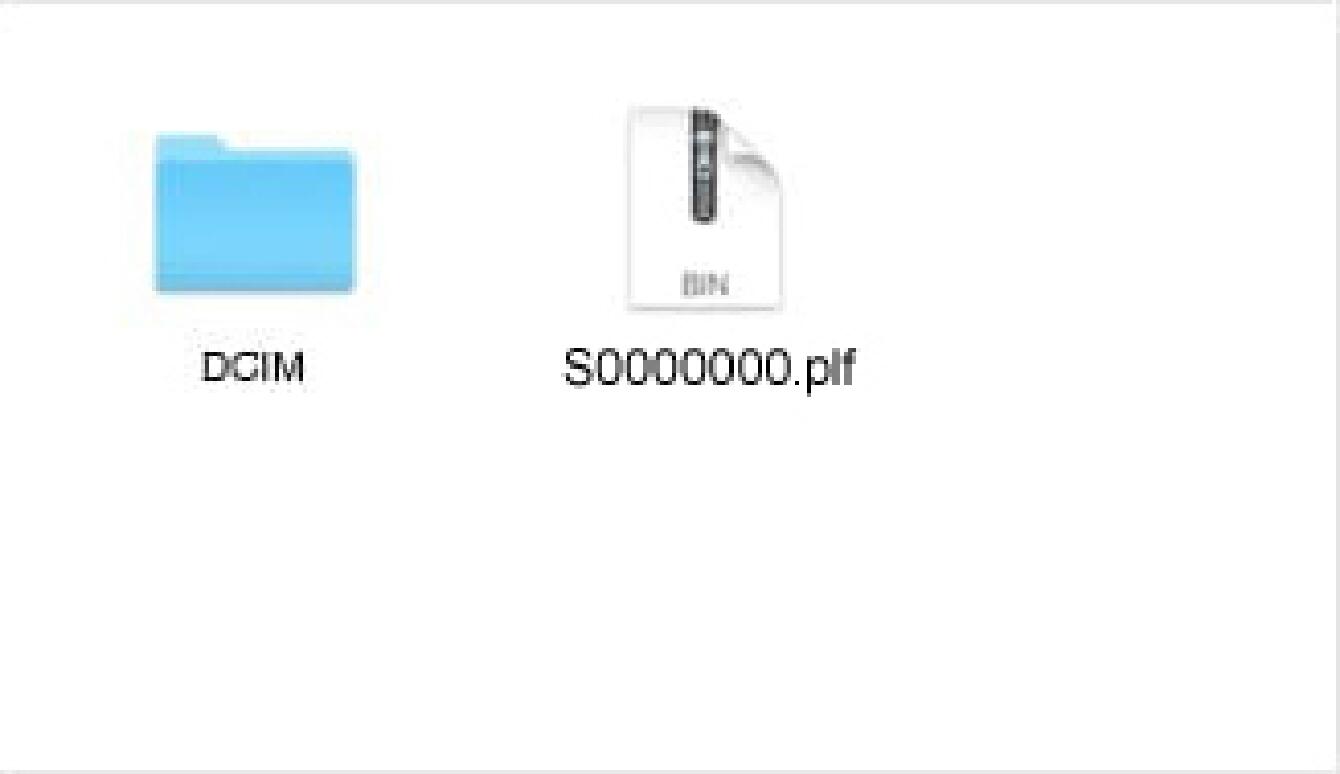
Connect the SD/SDHC/SDXC card to the computer via card reader etc. and copy the downloaded file to the root directory (the top layer of the file structure) of the SD/SDHC/SDXC card. (The copy destination is not in the “DCIM” subfolder)
(It appears differently depending on OS version.)
- STEP 03
Insert the SD/SDHC/SDXC card with the firmware to the camera and turn on the power.
- STEP 04
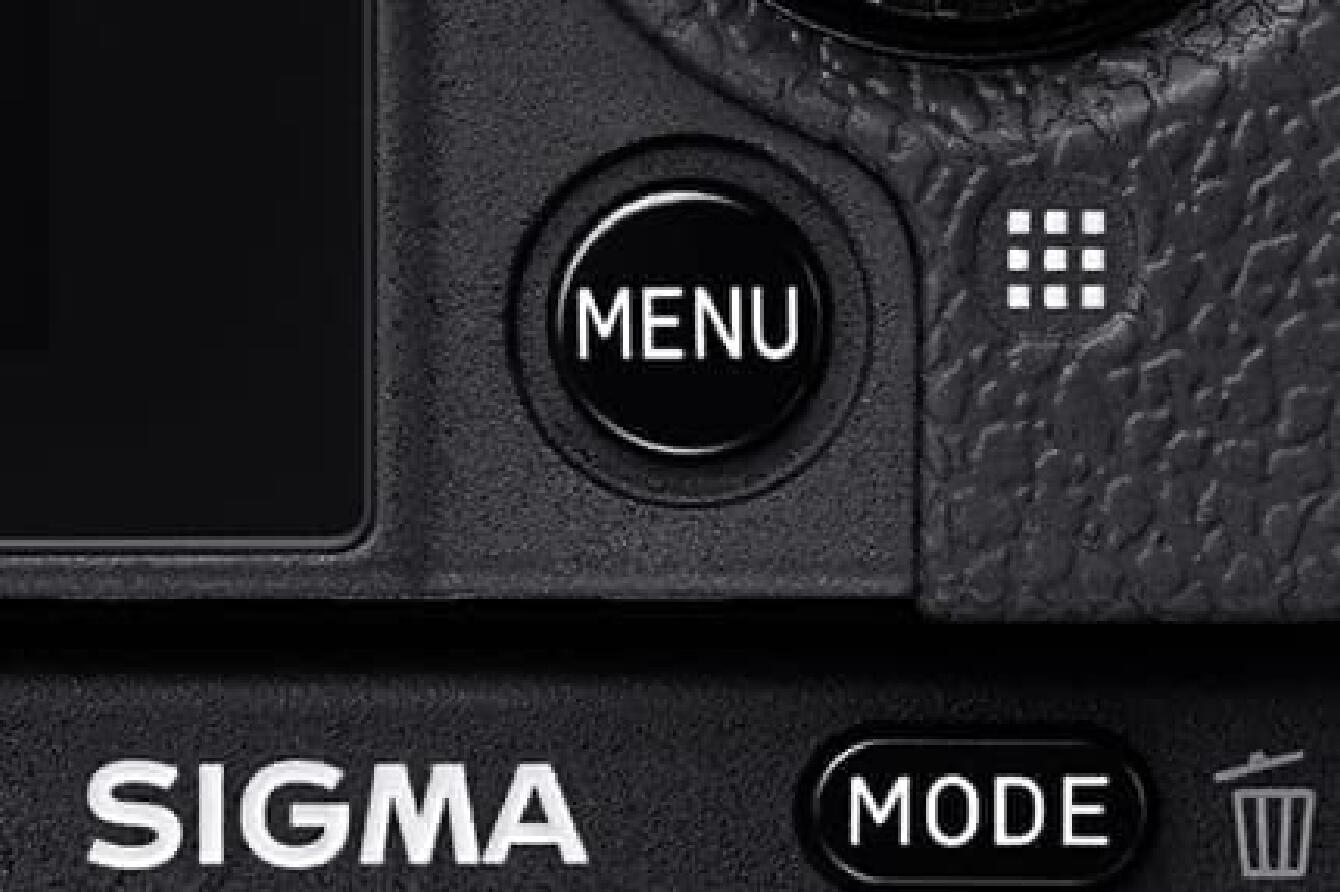
Press the MENU button on the back side of the camera body and open the setup menu.
- STEP 05
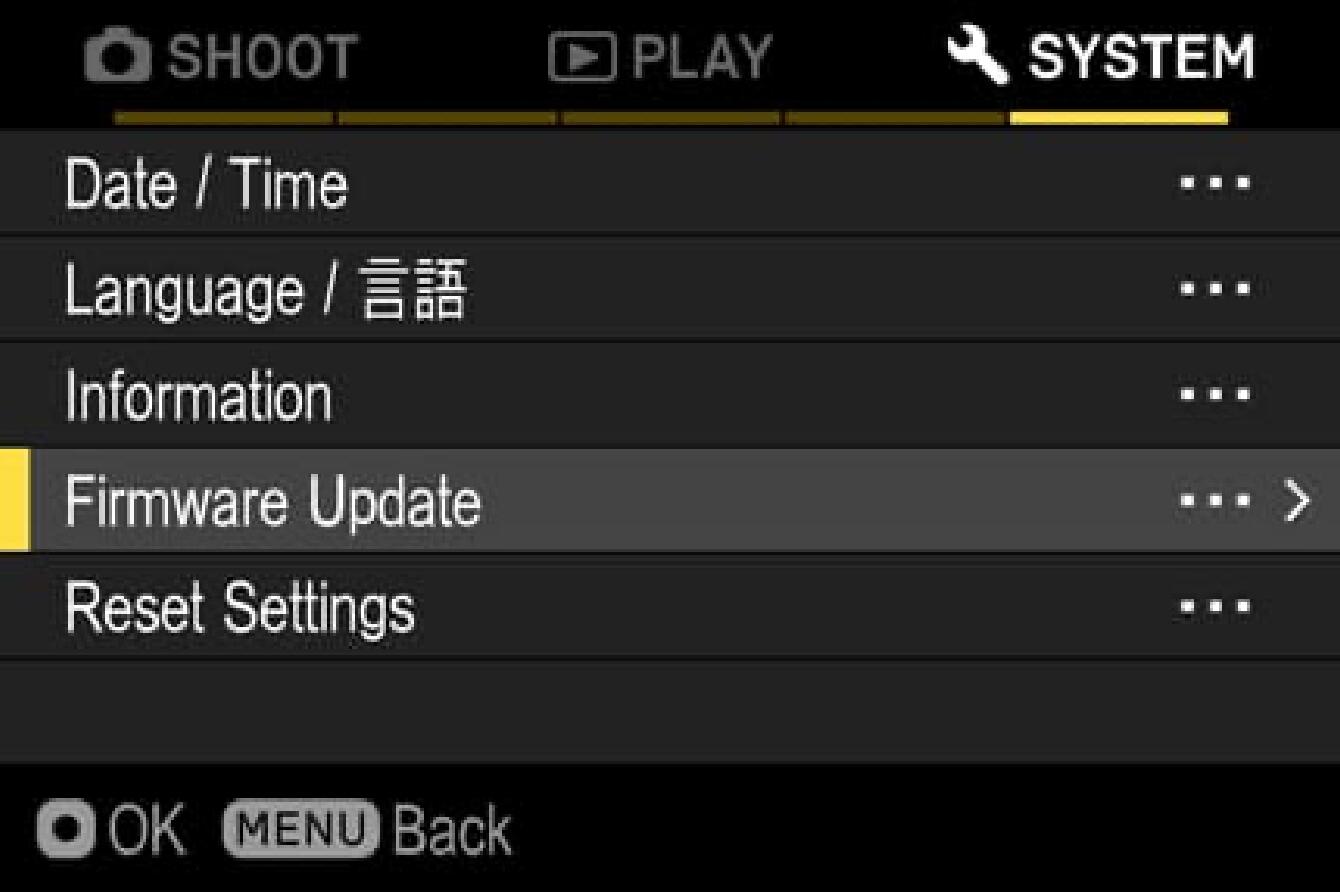
Select “Update Firmware” and select “OK”.
- STEP 06
After selecting the OK button, “Camera” and “Lens” appears on the display. Please select “Lens”.
- STEP 07
The message “Start firmware update?” will appear on the display.
- In case the message does not appear
In case the message “Start firmware update?” does not appear on the display, please check the following notes.
- The firmware update file is not installed in the card, or not in the appropriate directory.
The update file may not be in the card or the firmware may not be in the specified directory. Please repeat STEP 01.
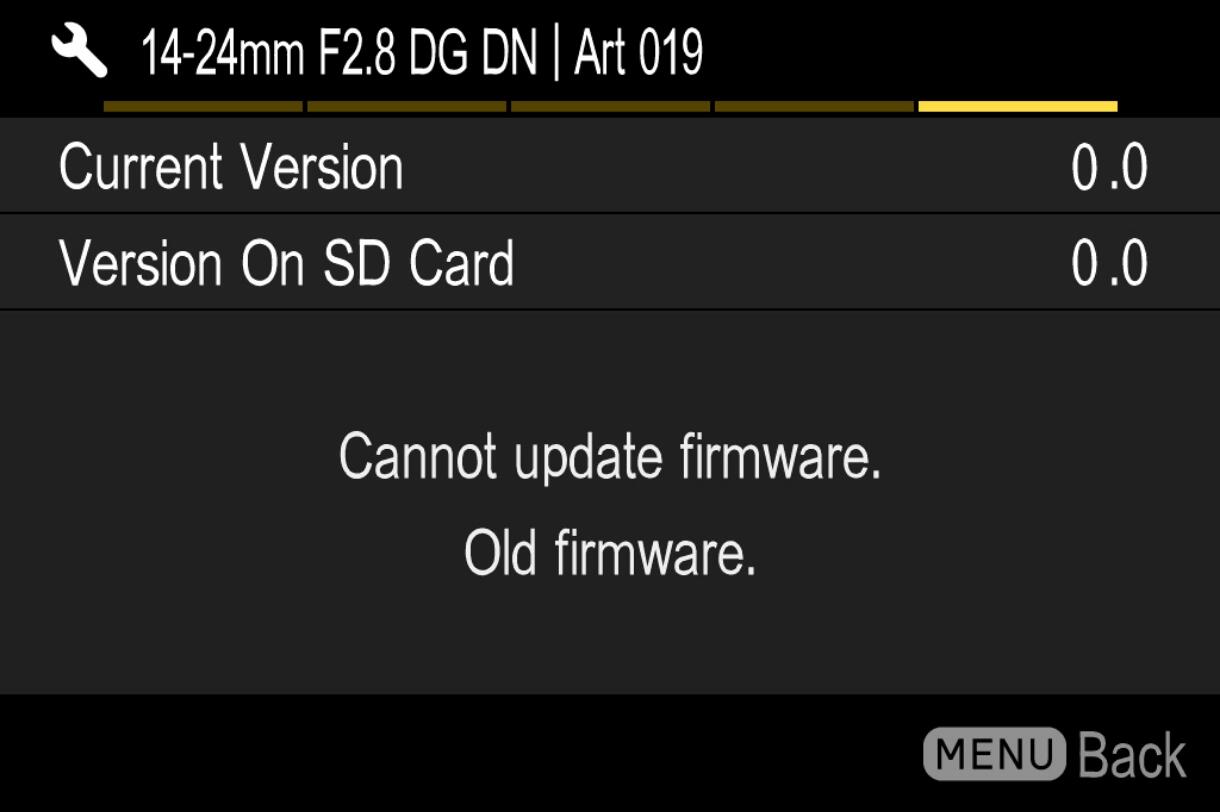
- The correct firmware is not installed.
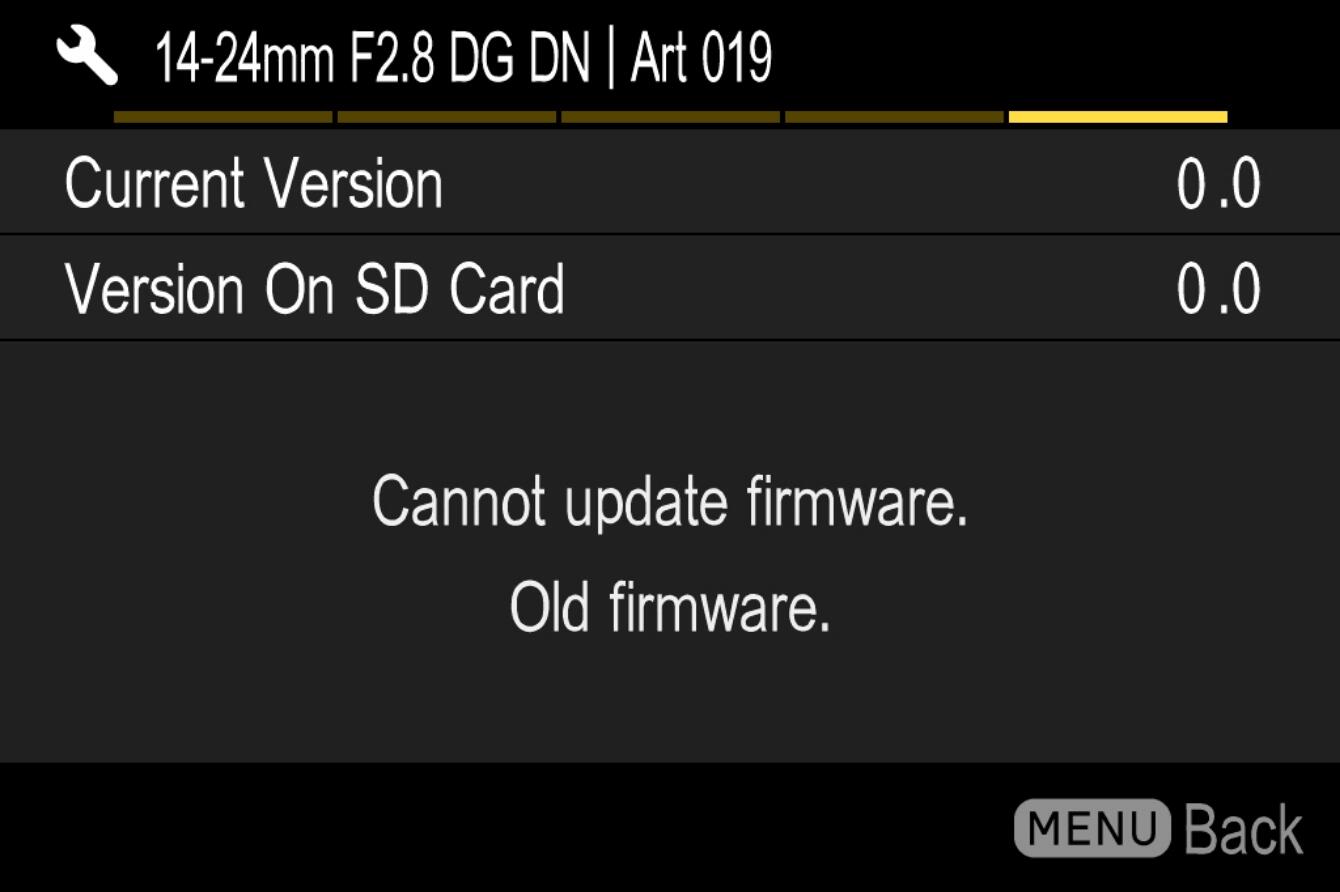
If the card contains a firmware version older than the lens, it cannot be updated. Put the correct version of firmware into the card and start over from STEP 02.
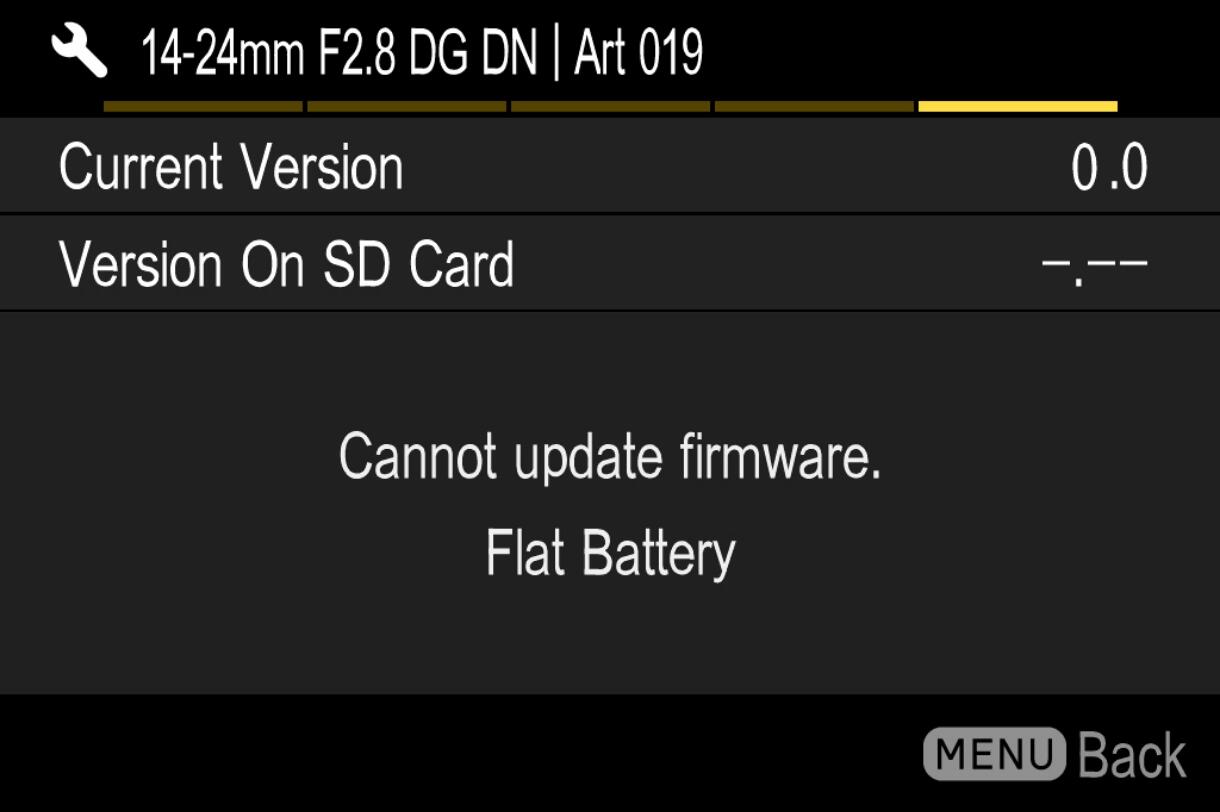
- There is not enough battery.
Use a fully charged battery or an AC adapter and start over from STEP 02.
- STEP 08
Select “Yes” to start the firmware update. Shortly the update will start.
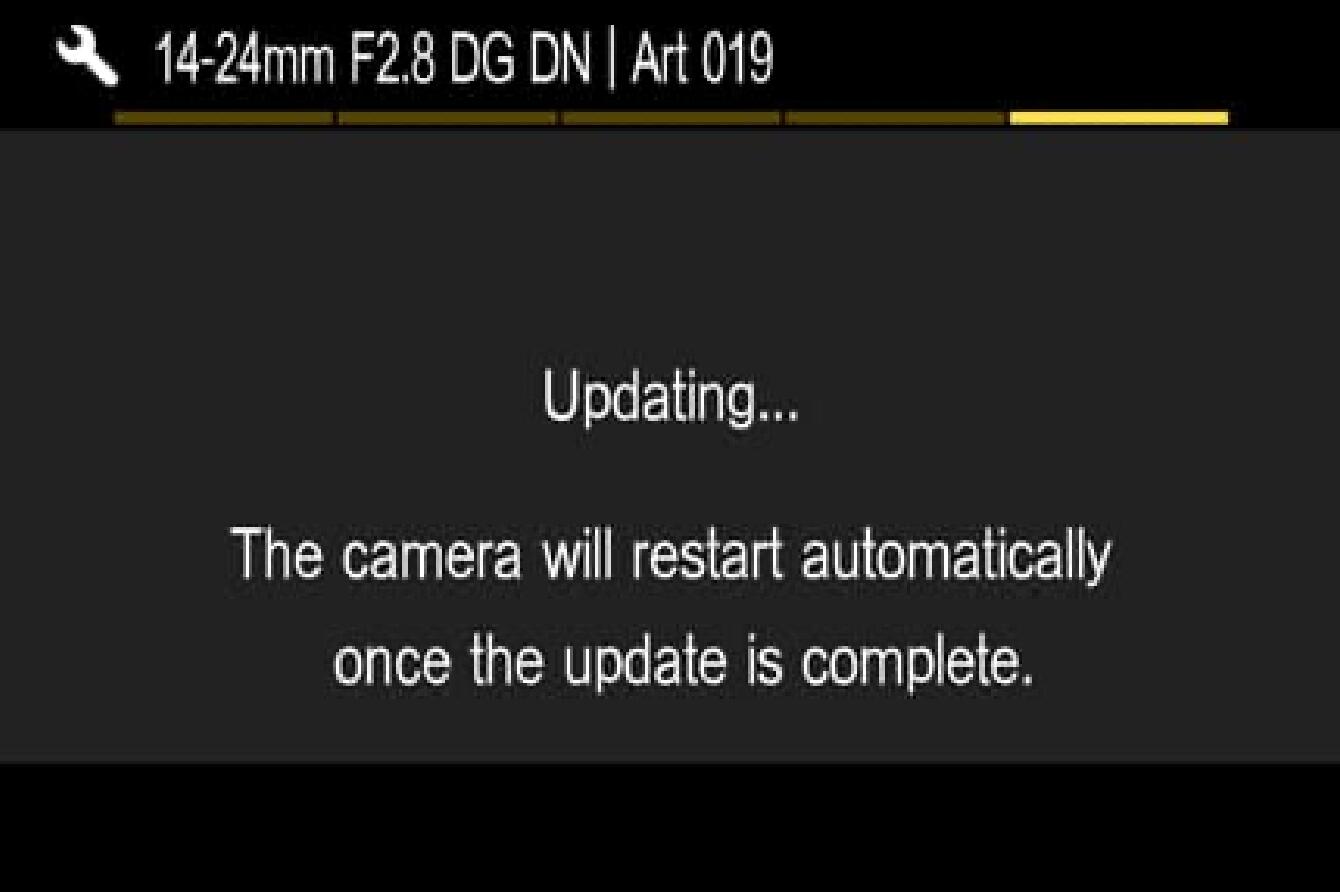
- Error
If the message “Firmware update has failed” is displayed during the firmware update, please contact our customer support.
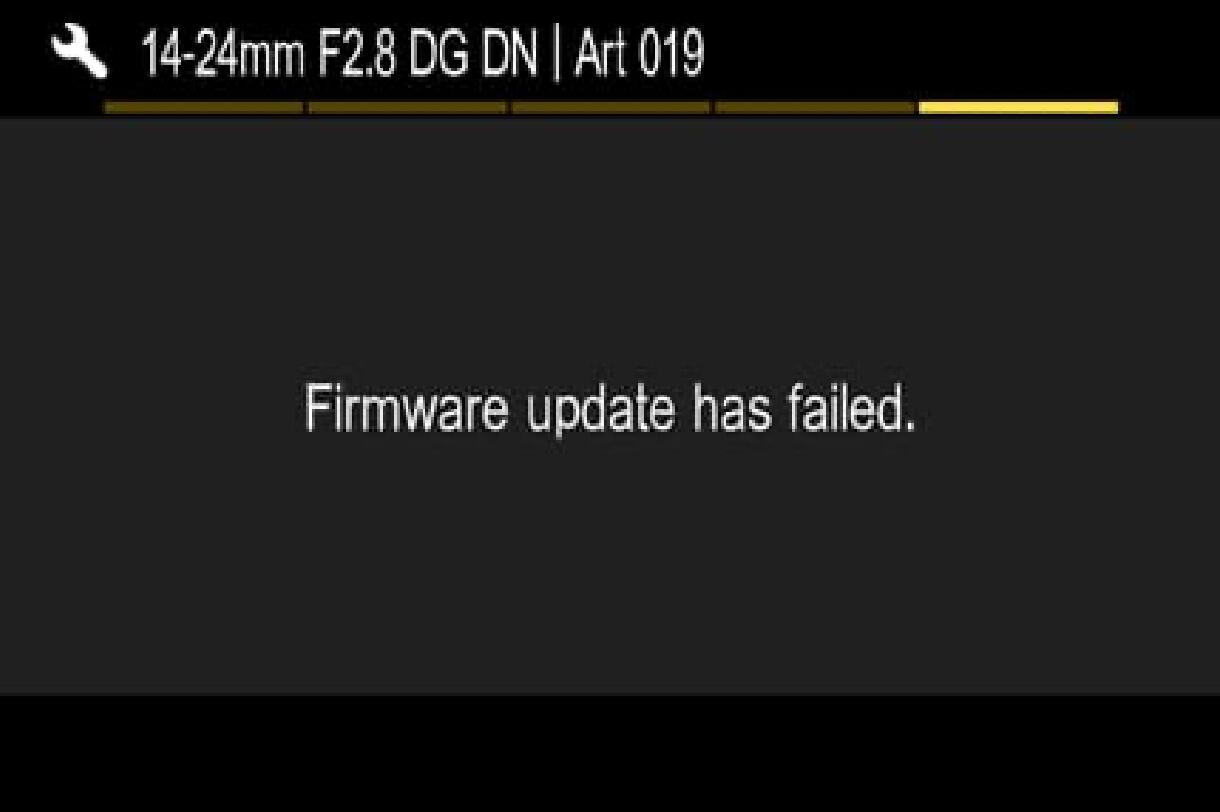
- STEP 09
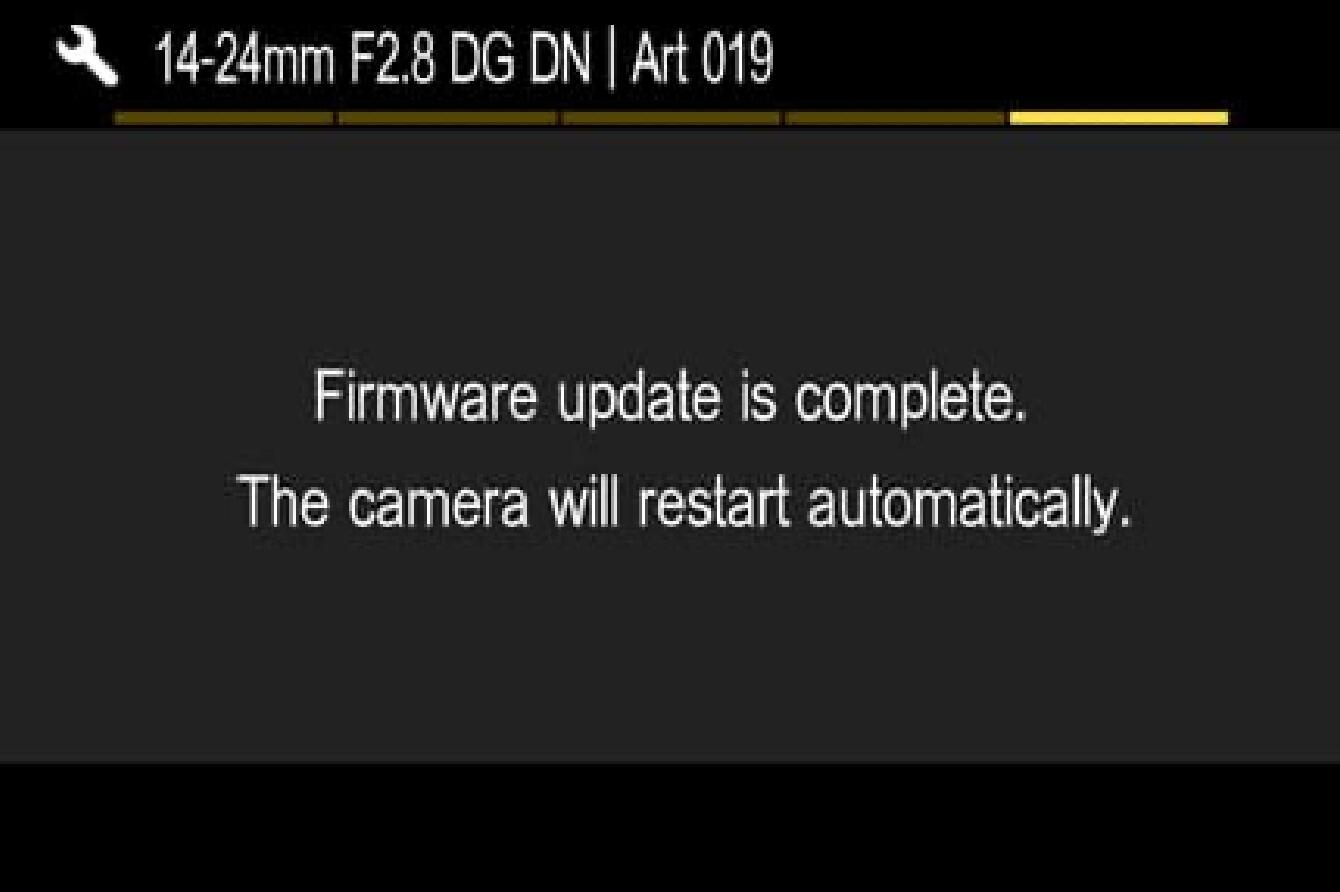
「When “Firmware update is complete. It will restart automatically” is displayed, the update is complete.
* Do not operate the camera until the update completion message appears.
- STEP 10
Check the “Information” version in the setup menu and confirm the lens version is updated to Ver.1.4
Update History
Ver.1.3 2020.09.17
The lens has become compatible with focus ring adjustment functionality.
For those who update the firmware in-camera, please refer to the following page for firmware update.
Ver.1.2 2020.03.18
The firmware update improves the performance of the Vignetting Correction.
Ver.1.1 2019.10.17
It has improved aperture operation during movie shooting when it is used in combination with the SIGMA fp.
It has optimized the communication of power consumption when used in combination with Leica CL and Leica SL cameras.
Art
14-24mm F2.8 DG DN
(Sony E-mount)
Before Updating
- Please ensure that the firmware of the camera body is updated to the latest version.
- Use a fully charged battery or connect the camera to the AC adapter
- Do not disconnect the battery or the AC adapter during the firmware update of the lens
- Ensure the power of the camera is always kept ON during the firmware update of the lens
Remove any memory card from the camera - The lens needs to be attached to a camera to update the firmware
- Download the " Sony Camera Driver " from the Sony Corporation website. Please read the Sony Camera Driver installation instructions.
- If you are using a Mac with Apple M series chip, please read the Procedure for Changing the Security Policy for Mac Computers with Apple Silicon.
- OS other than mac OS 12 / 13 / 14 are not supported. If you are unable to update, please contact your nearest authorized SIGMA subsidiary / distributor.
- Note: While the Sony Camera Driver supports macOS 11 / 12 / 13 / 14, the Lens System Software Updater program only supports macOS 12 / 13 / 14 (macOS 11 is not supported).
Ver.04 2024.07.25
・Compatibility with continuous shooting of up to approximately 120 frames per second has
been added for the autofocus modes (AF-S/DMF/MF) on Sony α9 III cameras.
・The operational stability has been improved.
Update Procedure
- STEP 01 Operating the Software Program
Select the file “Update_SigmaA1424F28V4.dmg” that has been downloaded onto the computer and double-click it to operate the software program.
* Do not connect the camera to the PC at this moment.
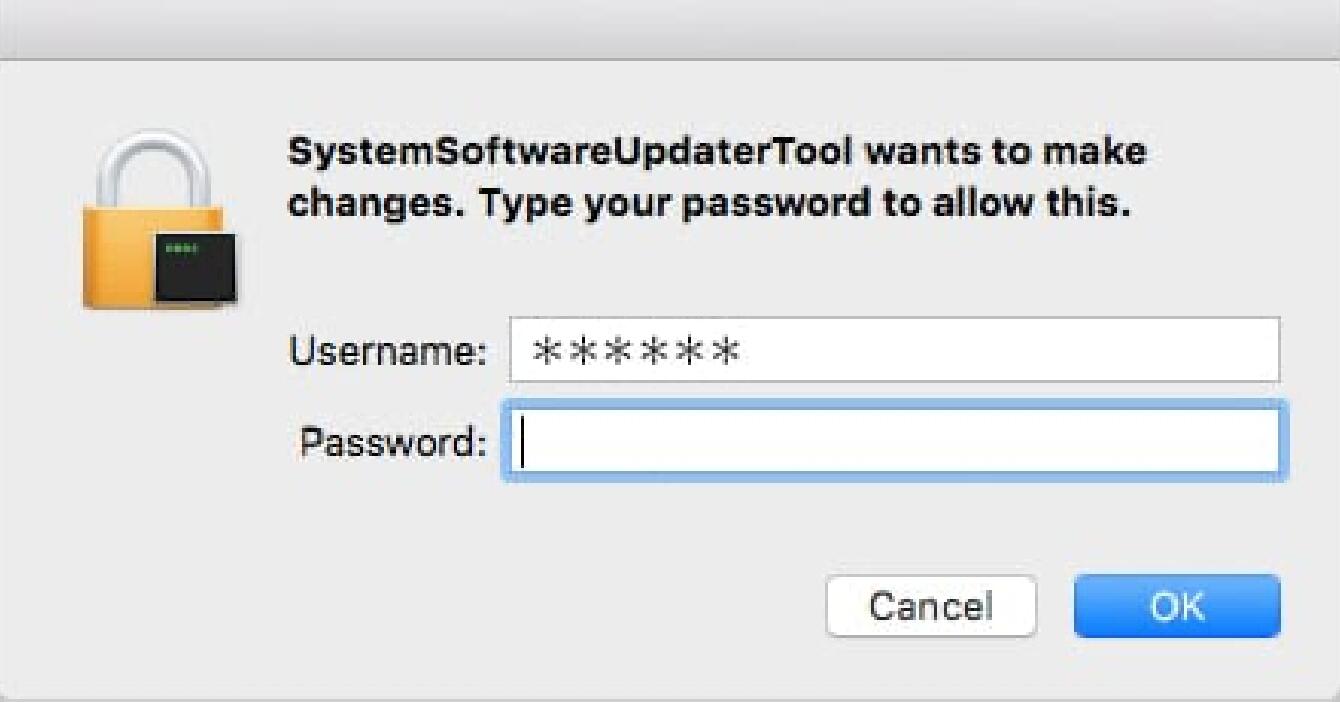
Login from the Administrator account to start up the Lens System Software Updater.
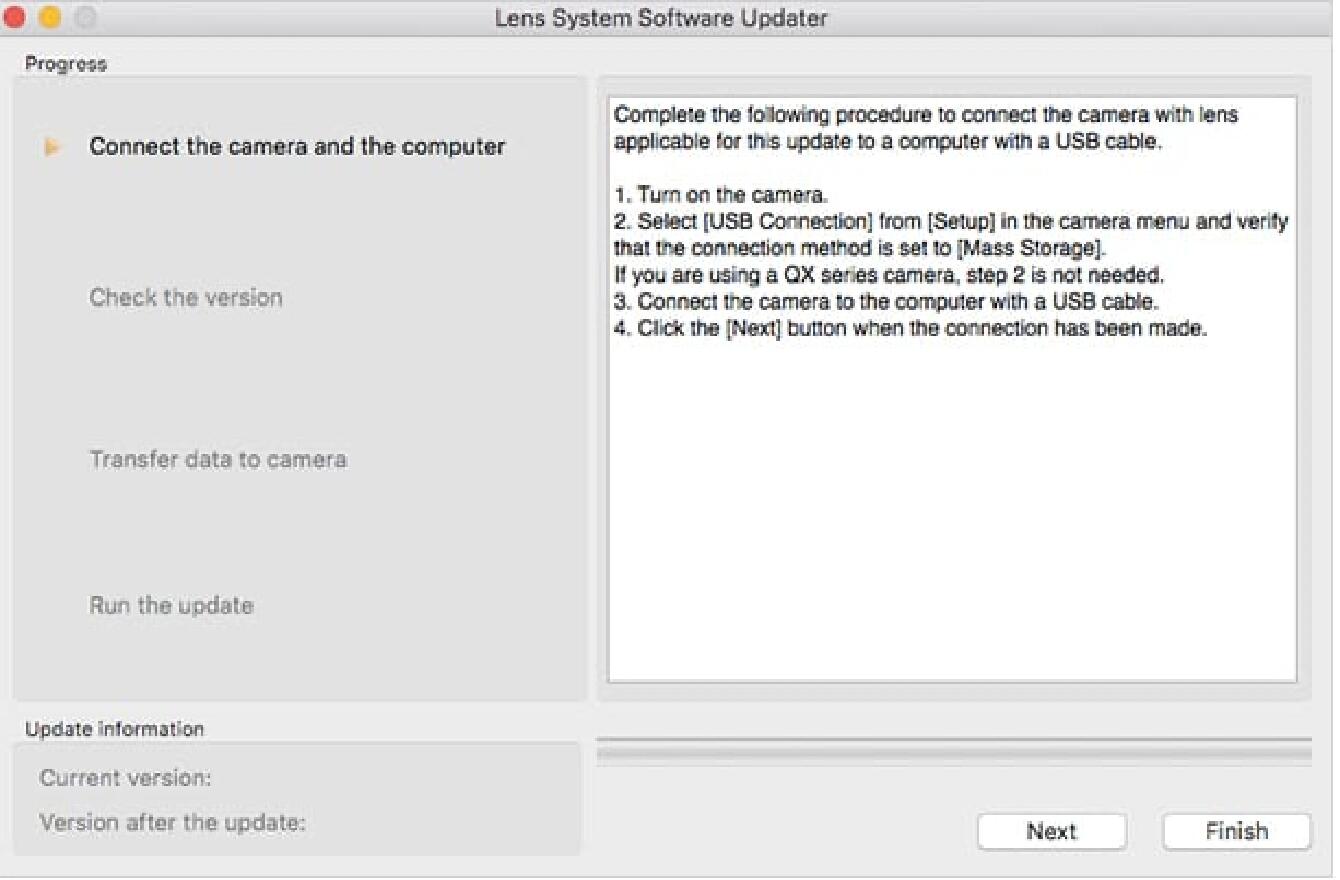
- STEP 02 Check the camera status
Turn on the camera and select “USB Connection” from the Menu. Then select “Mass Storage”.
* Some cameras do not require this process.
* Do not connect the camera to the PC in this process.
- STEP 03 Connect the camera to the PC
1. Ensure the memory card is removed while the lens is attached to the camera. Then use the supplied USB Cable to connect the camera to the PC.
2. After connecting the camera to the PC properly, select the “Next” button in the “Lens System Software Updater” and the below message will appear on the display;
* The message “follow the instructions on the computer” will appear on the camera display.
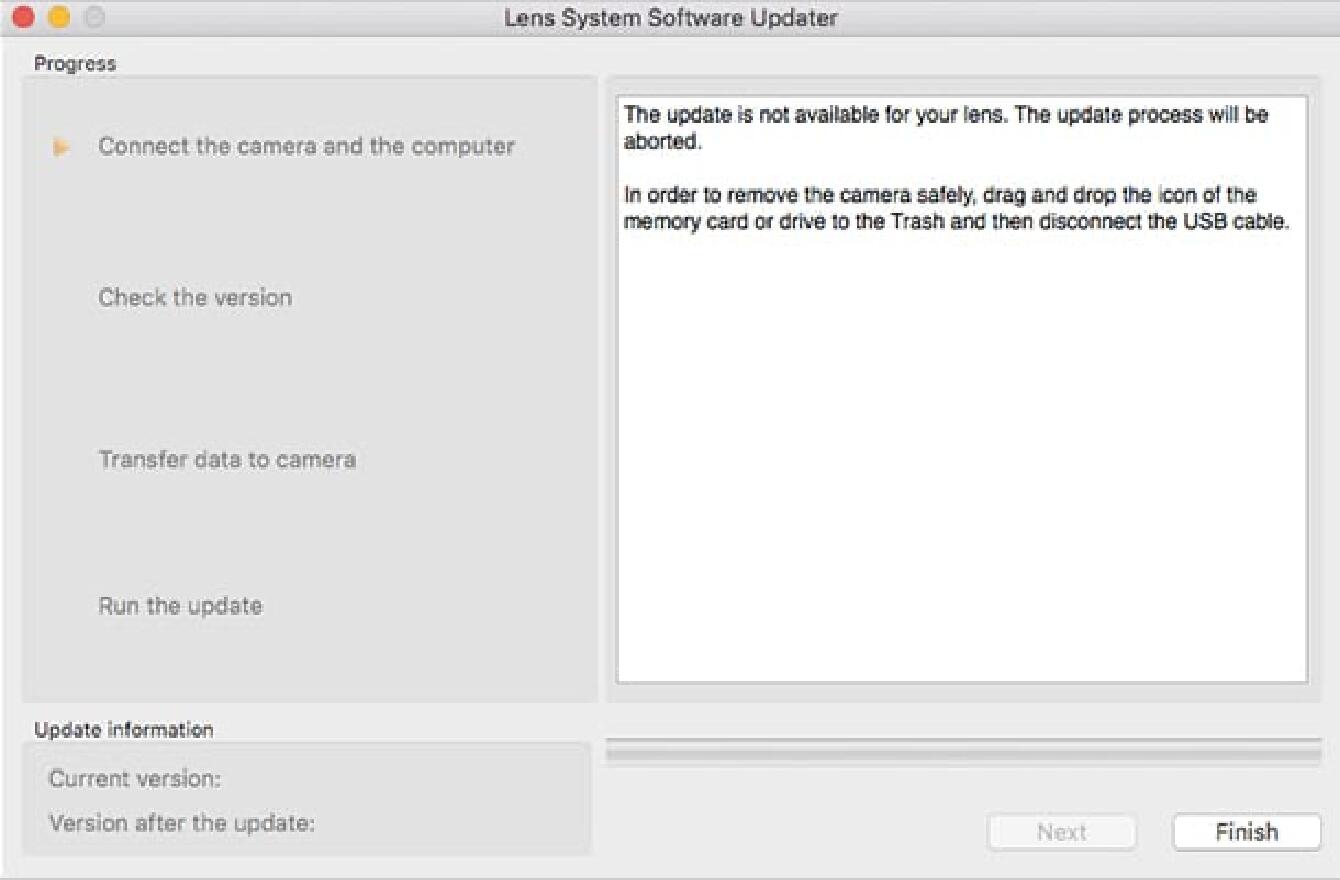
In the case of “The update is not available for your lens.” message appears, check the Lens System Software Updater is compatible with the lens to update.
If the message appears even when the software and the lens are appropriate, close the Lens System Software Updater and remove the cable and power OFF the camera.
Then, start over the update process from the STEP 01.
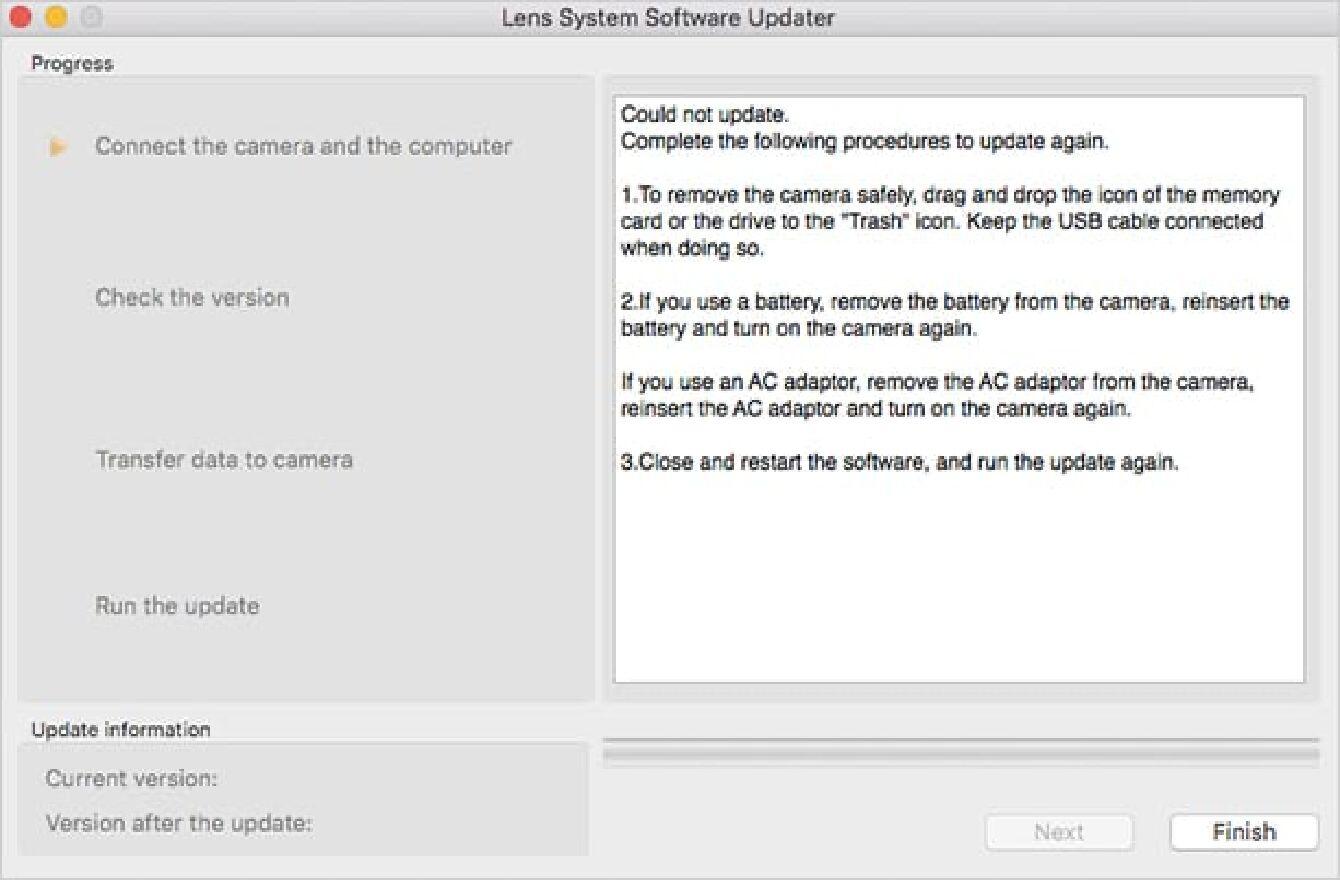
In case the message “Could not update” appears, follow the instructions in the dialog to check the status.
- STEP 04 Check the firmware version of the lens
Check the “Update Information” in the bottom left and confirm if the firmware version needs to be updated to Ver. 04.
Click the “Next” button to update it.
If the lens firmware is already Ver. 04, this process can be skipped.
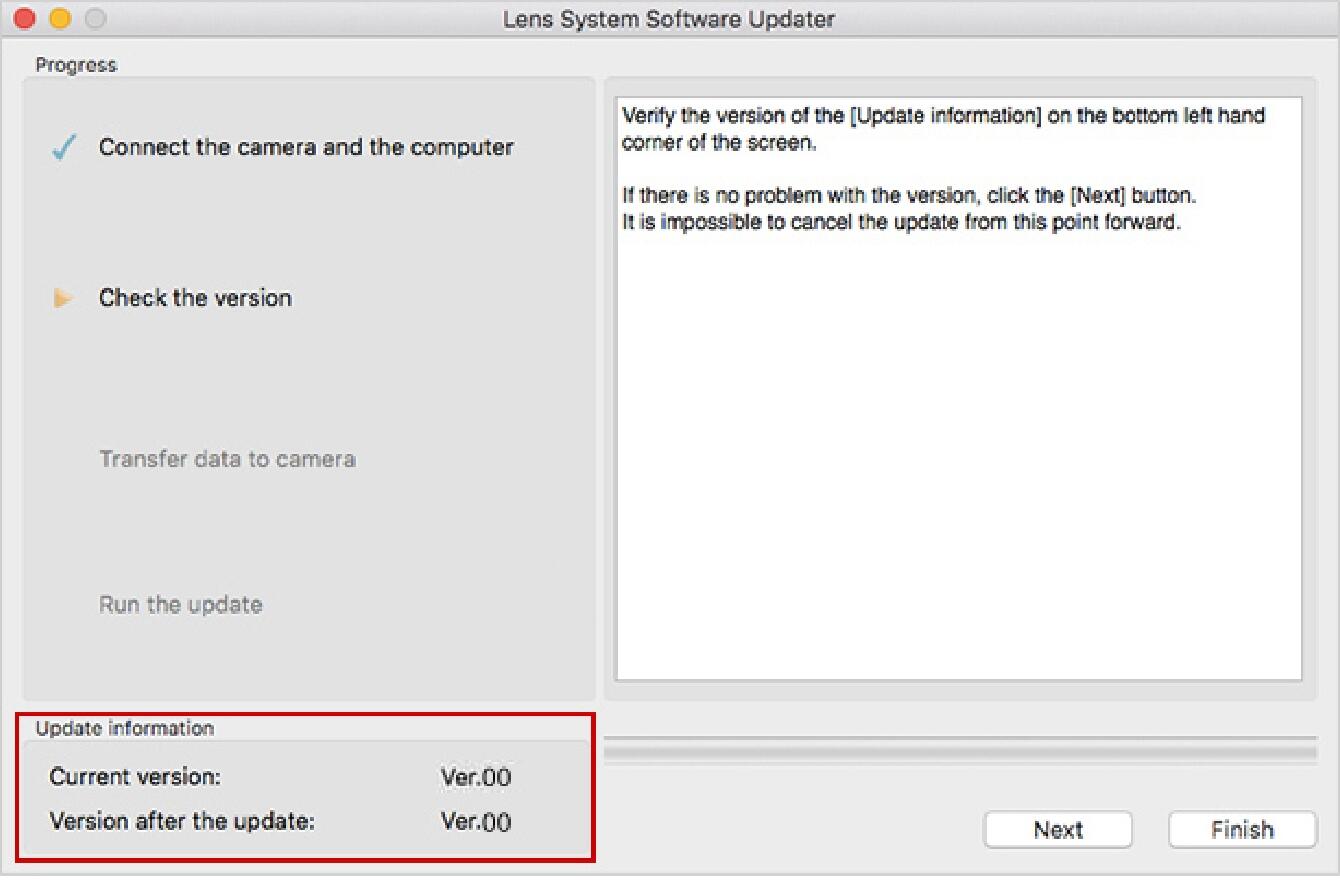
- STEP 05 Update the lens firmware
1. After checking the “Update Information”, click the “Next” button to start transferring the software data to the camera.
Do not power OFF the camera and ensure the USB cable is properly connected during the data transfer.
2. Once the data transfer is over, the following message will appear on the display, so click the “Finish” button.
3. After closing it, the message “Updating the lens” will appear on the camera display, and the firmware update of the lens will start.
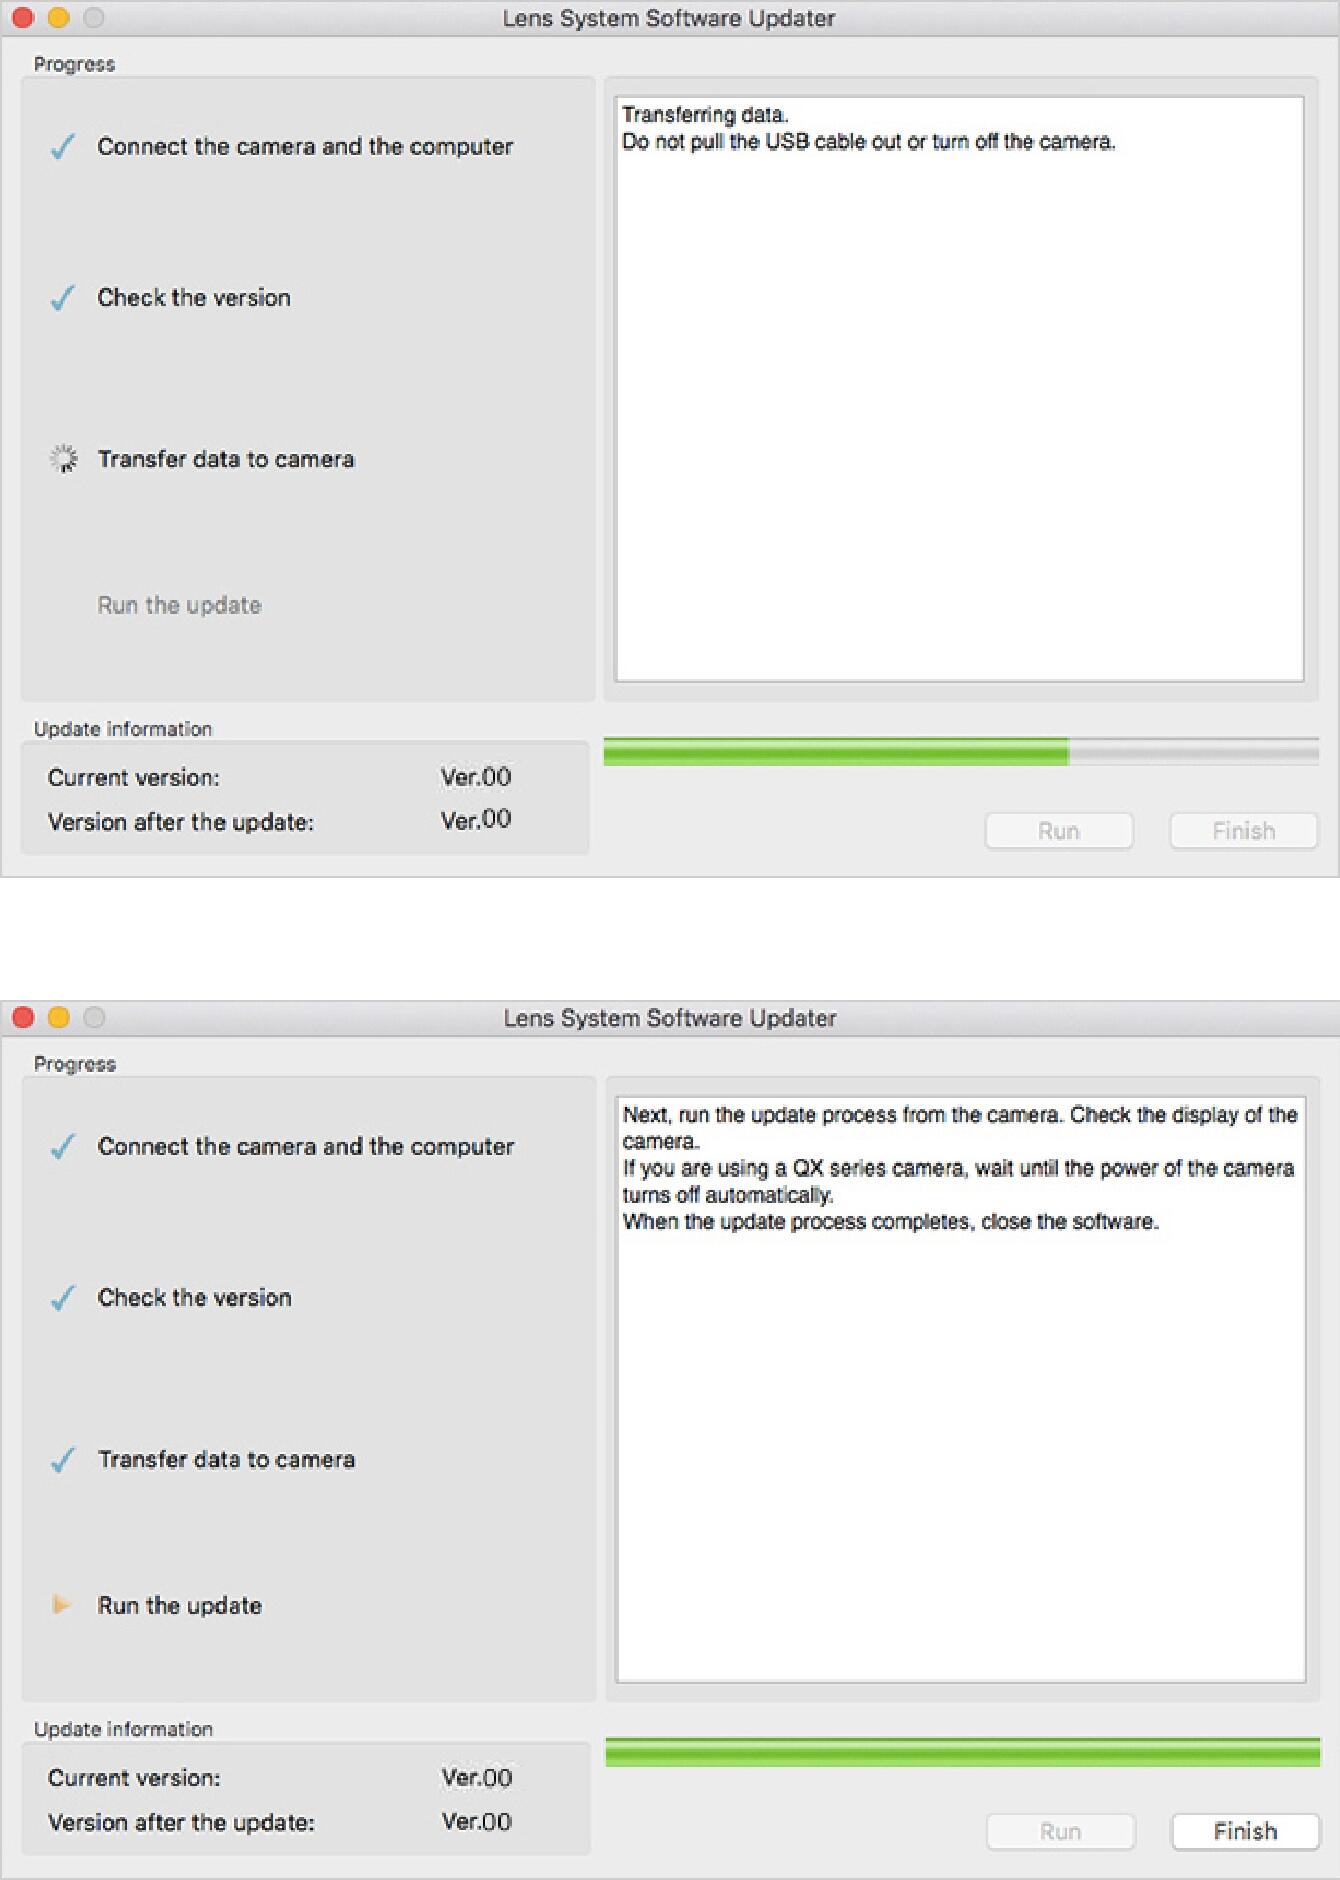
- STEP 06 Finish updating the firmware of the lens
When the message “Lens update complete.” appears on the camera display, the firmware update of the lens is successfully over. Follow the instructions on the screen to close the process. After closing it, remove the USB cable from the camera and the PC.
* After the firmware update is complete, turn off the camera and remove the battery or AC adapter.Then reinsert the battery/AC adapter and reboot the camera.
- STEP 07 Confirm the updated software version
Check the “Version” from the camera menu, and confirm the lens version is updated to Ver. 04.
Update History
Ver.03 2022.10.13
AF assist function during video recording is now supported.
*Only SONY camera models with AF assist function are supported.
The focus distance shown on the screen during manual focus has been optimized.
Ver.02 2020.05.21
It has helped improve the camera’s Peripheral shading functionality to reduce vignetting.
It has improved a rarely-occurring‘blinking’phenomenon during movie shooting.
SIGMA 14-24mm F2.8 DG DN | Art for Sony E-mount firmware Ver.02 is available for update at the following site.
Art
14-24mm F2.8 DG DN
(Sony E-mount)
Before Updating
- Please ensure that the firmware of the camera body is updated to the latest version.
- Use a fully charged battery or connect the camera to the AC adapter
- Do not disconnect the battery or the AC adapter during the firmware update of the lens
- Ensure the power of the camera is always kept ON during the firmware update of the lens
- Remove any memory card from the camera
- The lens needs to be attached to a camera to update the firmware
- OS other than Windows 10, Windows 11 are not supported. If you are unable to update, please contact your nearest authorized SIGMA subsidiary / distributor.
Ver.04 2024.07.25
・Compatibility with continuous shooting of up to approximately 120 frames per second has been added for the autofocus modes (AF-S/DMF/MF) on Sony α9 III cameras.
・The operational stability has been improved.
Update Procedure
- STEP 01 Operating the Software Program
Select the file “Update_SigmaA1424F28V4.exe” that has been downloaded onto the computer and double-click it to operate the software program.
* Do not connect the camera to the PC at this moment.
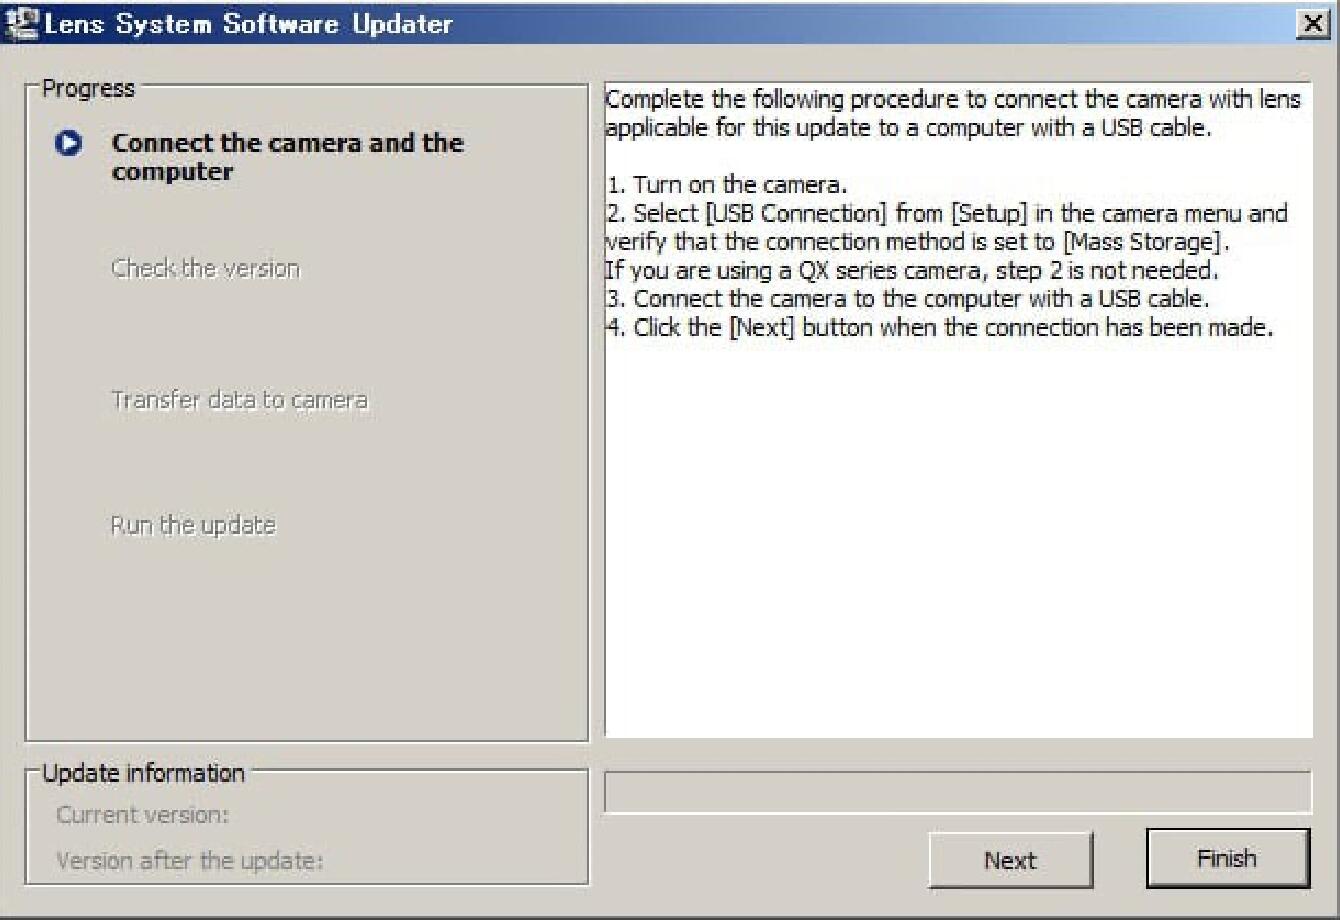
- STEP 02 Check the camera status
Turn on the camera and select “USB Connection” from the Menu. Then select “Mass Storage”.
* Some cameras do not require this process.
* Do not connect the camera to the PC in this process.
- STEP 03 Connect the camera to the PC
1. Ensure the memory card is removed while the lens is attached to the camera. Then use the supplied USB Cable to connect the camera to the PC.
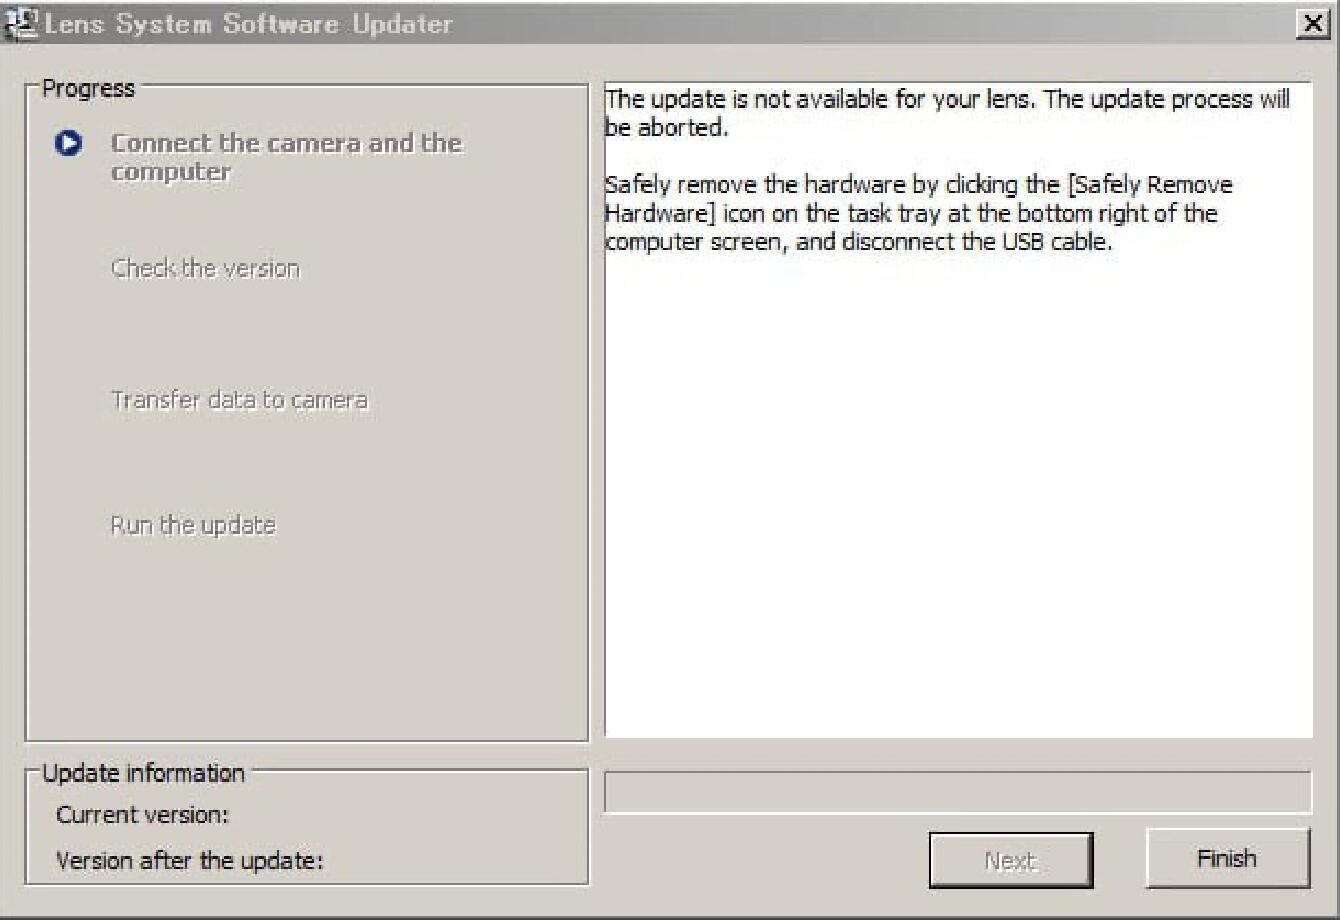
2. After connecting the camera to the PC properly, select the “Next” button in the “Lens System Software Updater” and the below message will appear on the display;
* The message “Follow computer instructions.” will appear on the camera display.
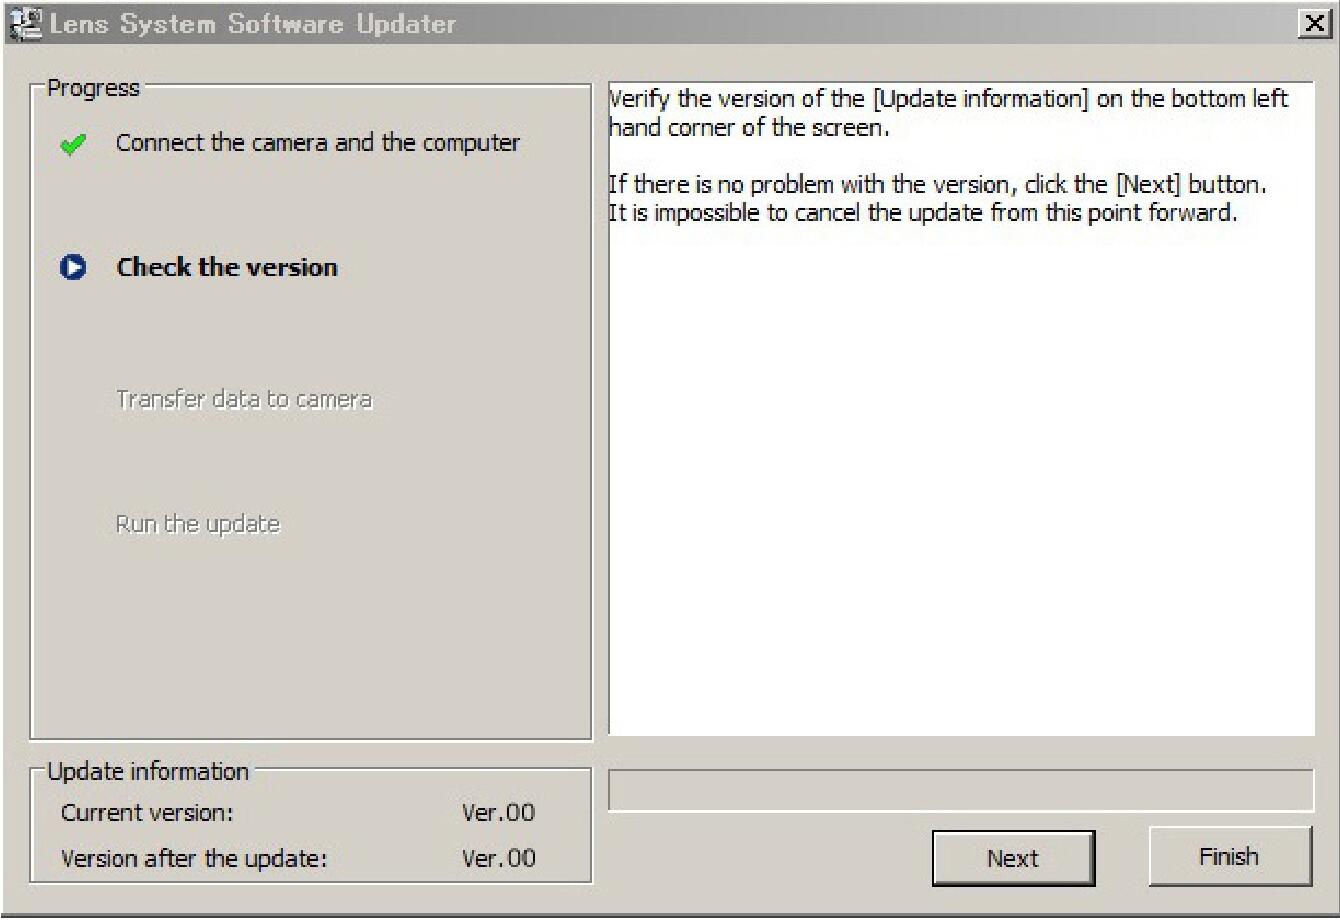
In the case of “The update is not available for your lens” message appears, check the Lens System Software Updater is compatible with the lens to update.
If the message appears even when the software and the lens are appropriate, close the Lens System Software Updater and remove the cable and power OFF the camera.
Then, start over the update process from the STEP 01.
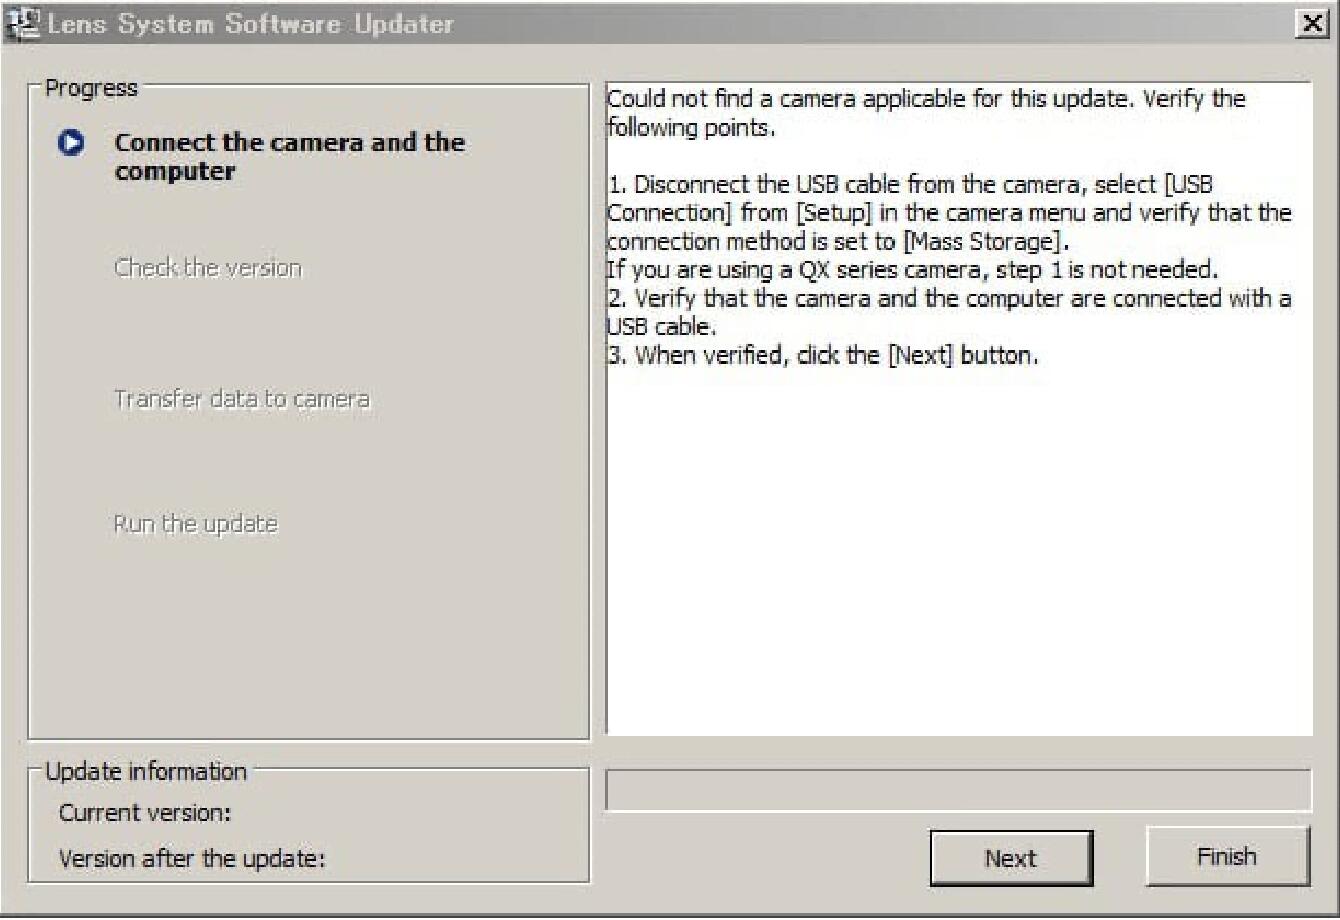
In case the message “Could not find a camera applicable for this update” appears, follow the instructions in the dialog to check the status.
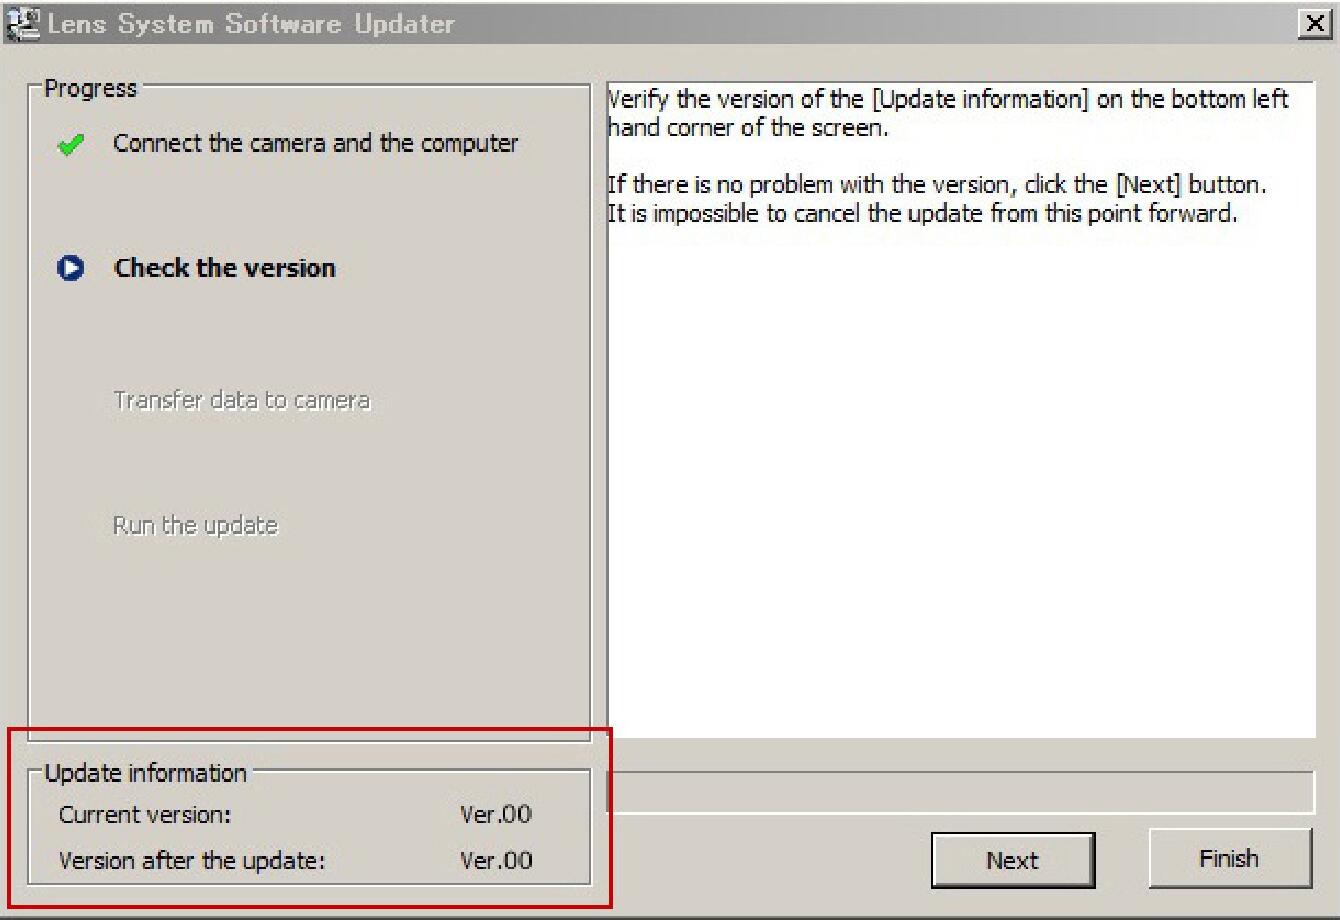
- STEP 04 Check the firmware version of the lens
Check the “Update Information” in the bottom left and confirm if the firmware version needs to be updated to Ver. 03.
Click the “Next” button to update it.
If the lens firmware is already Ver. 03, this process can be skipped.
- STEP 05 Update the lens firmware
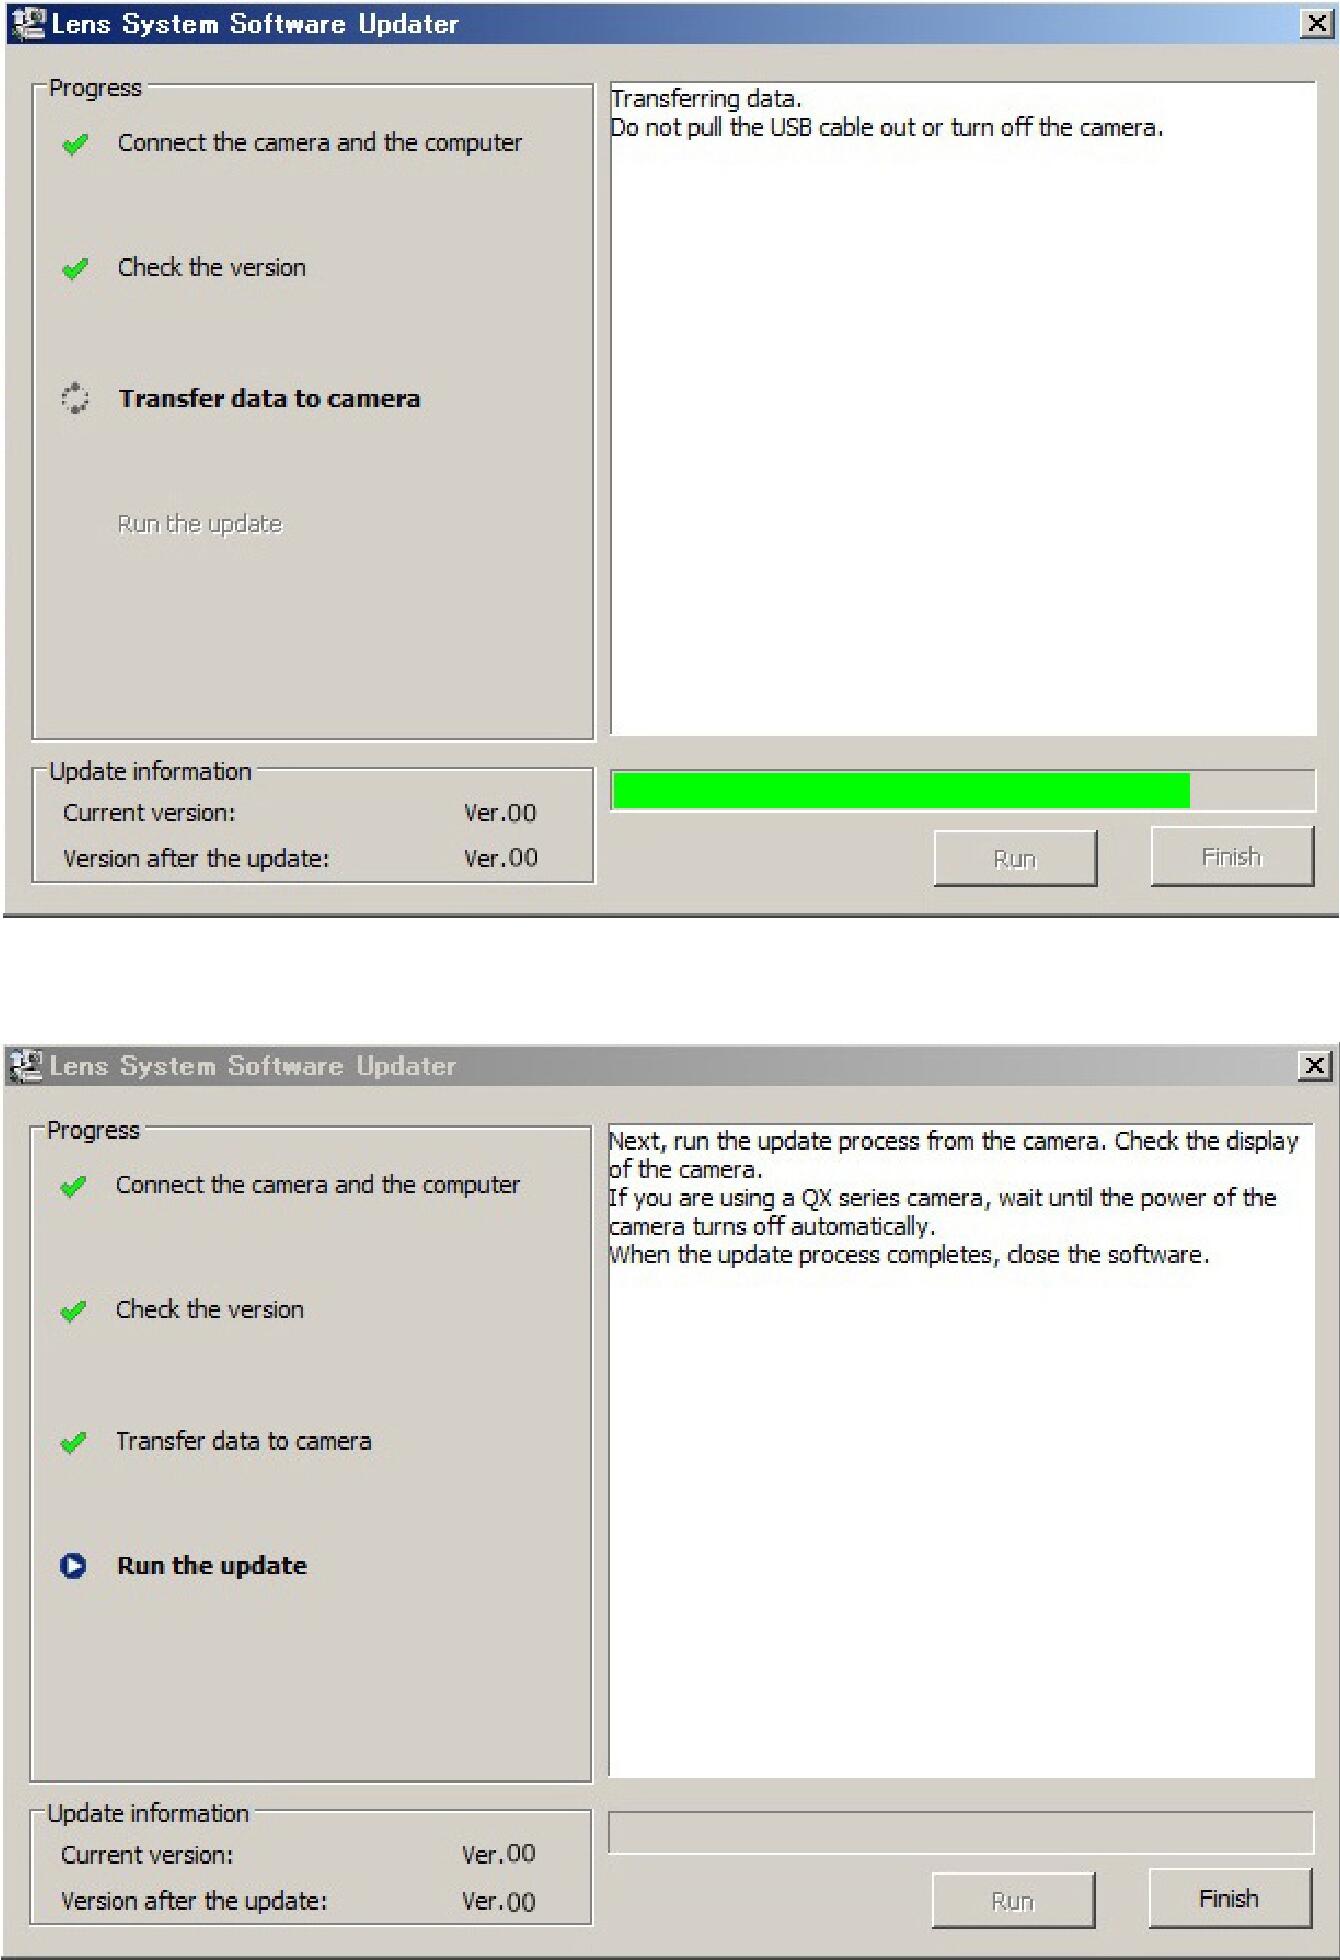
1. After checking the “Update Information”, click the “Next” button to start transferring the software data to the camera.
Do not power OFF the camera and ensure the USB cable is properly connected during the data transfer.
2. Once the data transfer is over, the following message will appear on the display, so click the “Finish” button.
3. After closing it, the message “Updating the lens” will appear on the camera display, and the firmware update of the lens will start.
- STEP 06 Finish updating the firmware of the lens
When the message “Lens update complete.” appears on the camera display, the firmware update of the lens is successfully over. Follow the instructions on the screen to close the process. After closing it, remove the USB cable from the camera and the PC.
* After the firmware update is complete, turn off the camera and remove the battery or AC adapter. Then reinsert the battery/AC adapter and reboot the camera.
- STEP 07 Confirm the updated software version
Check the “Version.” from the camera menu, and confirm the lens version is updated to Ver. 03.
Update History
Ver.03 2022.10.13
AF assist function during video recording is now supported.
*Only SONY camera models with AF assist function are supported.
The focus distance shown on the screen during manual focus has been optimized.
Ver.02 2020.05.21
It has helped improve the camera’s Peripheral shading functionality to reduce vignetting.
It has improved a rarely-occurring‘blinking’phenomenon during movie shooting.
SIGMA 14-24mm F2.8 DG DN | Art for Sony E-mount firmware Ver.02 is available for update at the following site.